Jump Start Your Editing with New Easy-To-Use Profiles in Lightroom Classic
In “What’s Wrong with This Image? Mastering a Develop Module Workflow”, I emphasized the importance of selecting a camera profile early in the editing process. Lightroom has long offered camera profiles to emulate in-camera picture styles, but until recently they were hidden away in the Camera Calibration panel at the bottom of the panel stack. Few people knew they existed, or how to use them. Finally, as of Lightroom’s April 2018 release, profiles have gained rock star status, moving to the top of the Basic panel as a greatly expanded set of raw and creative profiles, displayed in a matrix of easy to use preview buttons.
- What is a Camera Profile?
In the digital imaging universe, the term “profile” has many meanings. Printers, displays, color and working spaces all have profiles. In Lightroom, profiles convert raw camera information into specific “looks”, which leave your slider values untouched, but change the appearance of your raw photo. Without a profile, raw data can’t be displayed as a visible image.
Adobe builds profiles for nearly every camera make and model their software supports, incorporating deep imaging science that looks at how the camera’s otherwise colorblind sensor interprets color and contrast. Profiles utilize information about the specific sensitivity of each camera’s sensor in order to emulate its behavior in different lighting conditions and at different ISO values, and then translate the digital data into viewable images.
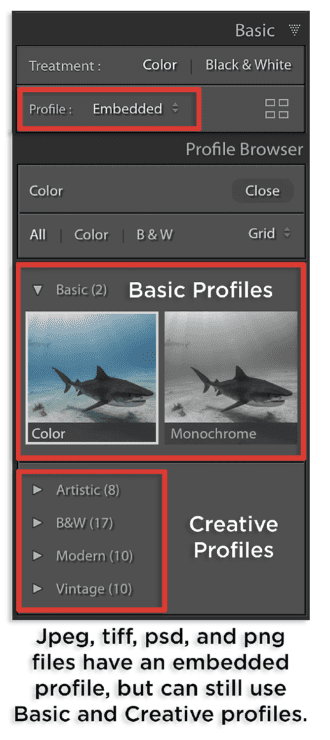
For non-raw photos like JPEGs, TIFFs or PSDs, a profile isn’t needed to display the image, because an interpretation of the data has already been baked in by the camera, or by an external software application like Photoshop. For these photos, profiles can be used for creative purposes, similar to how an Instagram filter changes the look and impact of a picture.
- Browsing and Applying Profiles
In Lightroom Classic, the Profile pop-up is found at the top of the Develop Basic panel.
To peruse the full menu of profile previews, click the four-square icon in the upper right of the Basic panel to open the Profile Browser.
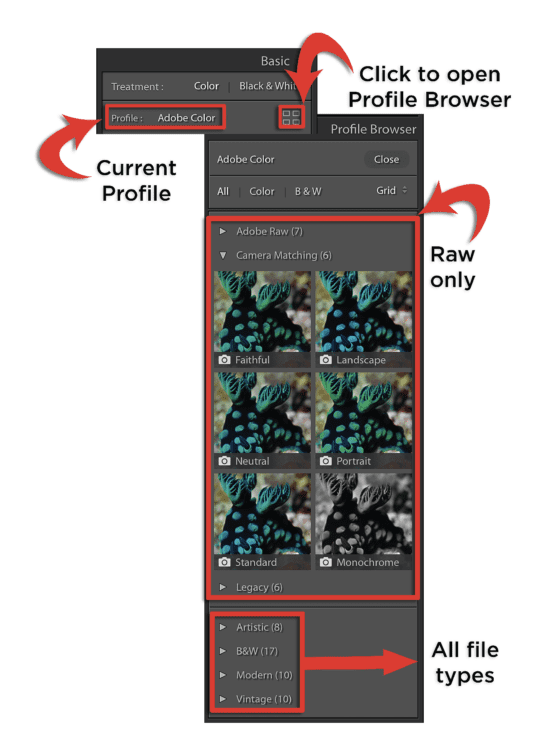
If the thumbnails are too small to view clearly, roll the cursor on top of any profile thumbnail or name to display the profile on the main image preview.
Once you’ve decided on a profile, click on its thumbnail to apply it, and click the Close button at the top right of the panel to return to the regular Develop panels. You can also double-click the profile thumbnail to apply it and close the browser at the same time.
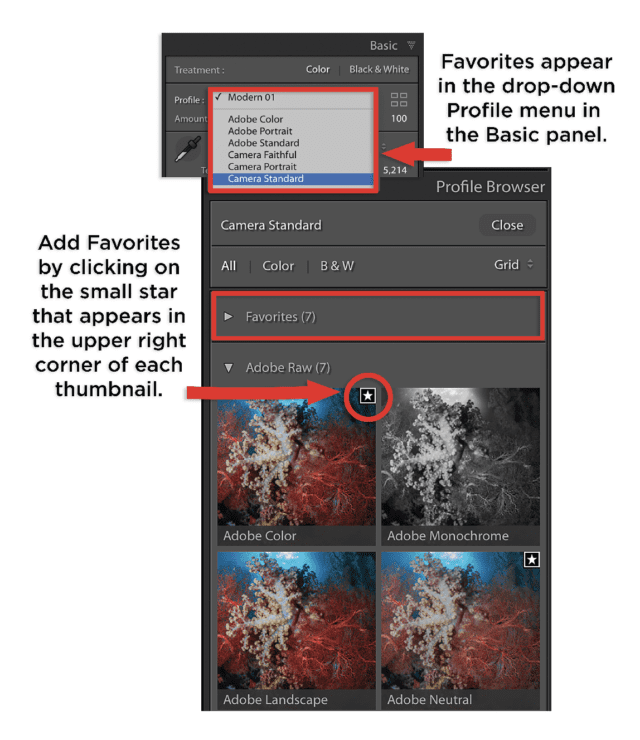
If you find yourself using the same profile over and over again, click on the tiny star icon in the upper right corner of the icon to set it as a favorite. Favorites are grouped into the Favorites folder in the Profiles Browser, but more importantly, are added to the main profile drop-down menu, which saves you from having to open the Profile Browser each time you want to switch profiles.
- Profiles for Raw Photos
There are two main categories of profiles – camera profiles and creative profiles.
Adobe Raw and Camera Matching profiles are available for raw photos only.
Adobe Raw Profiles
The previous default profile, Adobe Standard, was applied to all raw images at import in an effort to make photos from different cameras look as similar as possible.
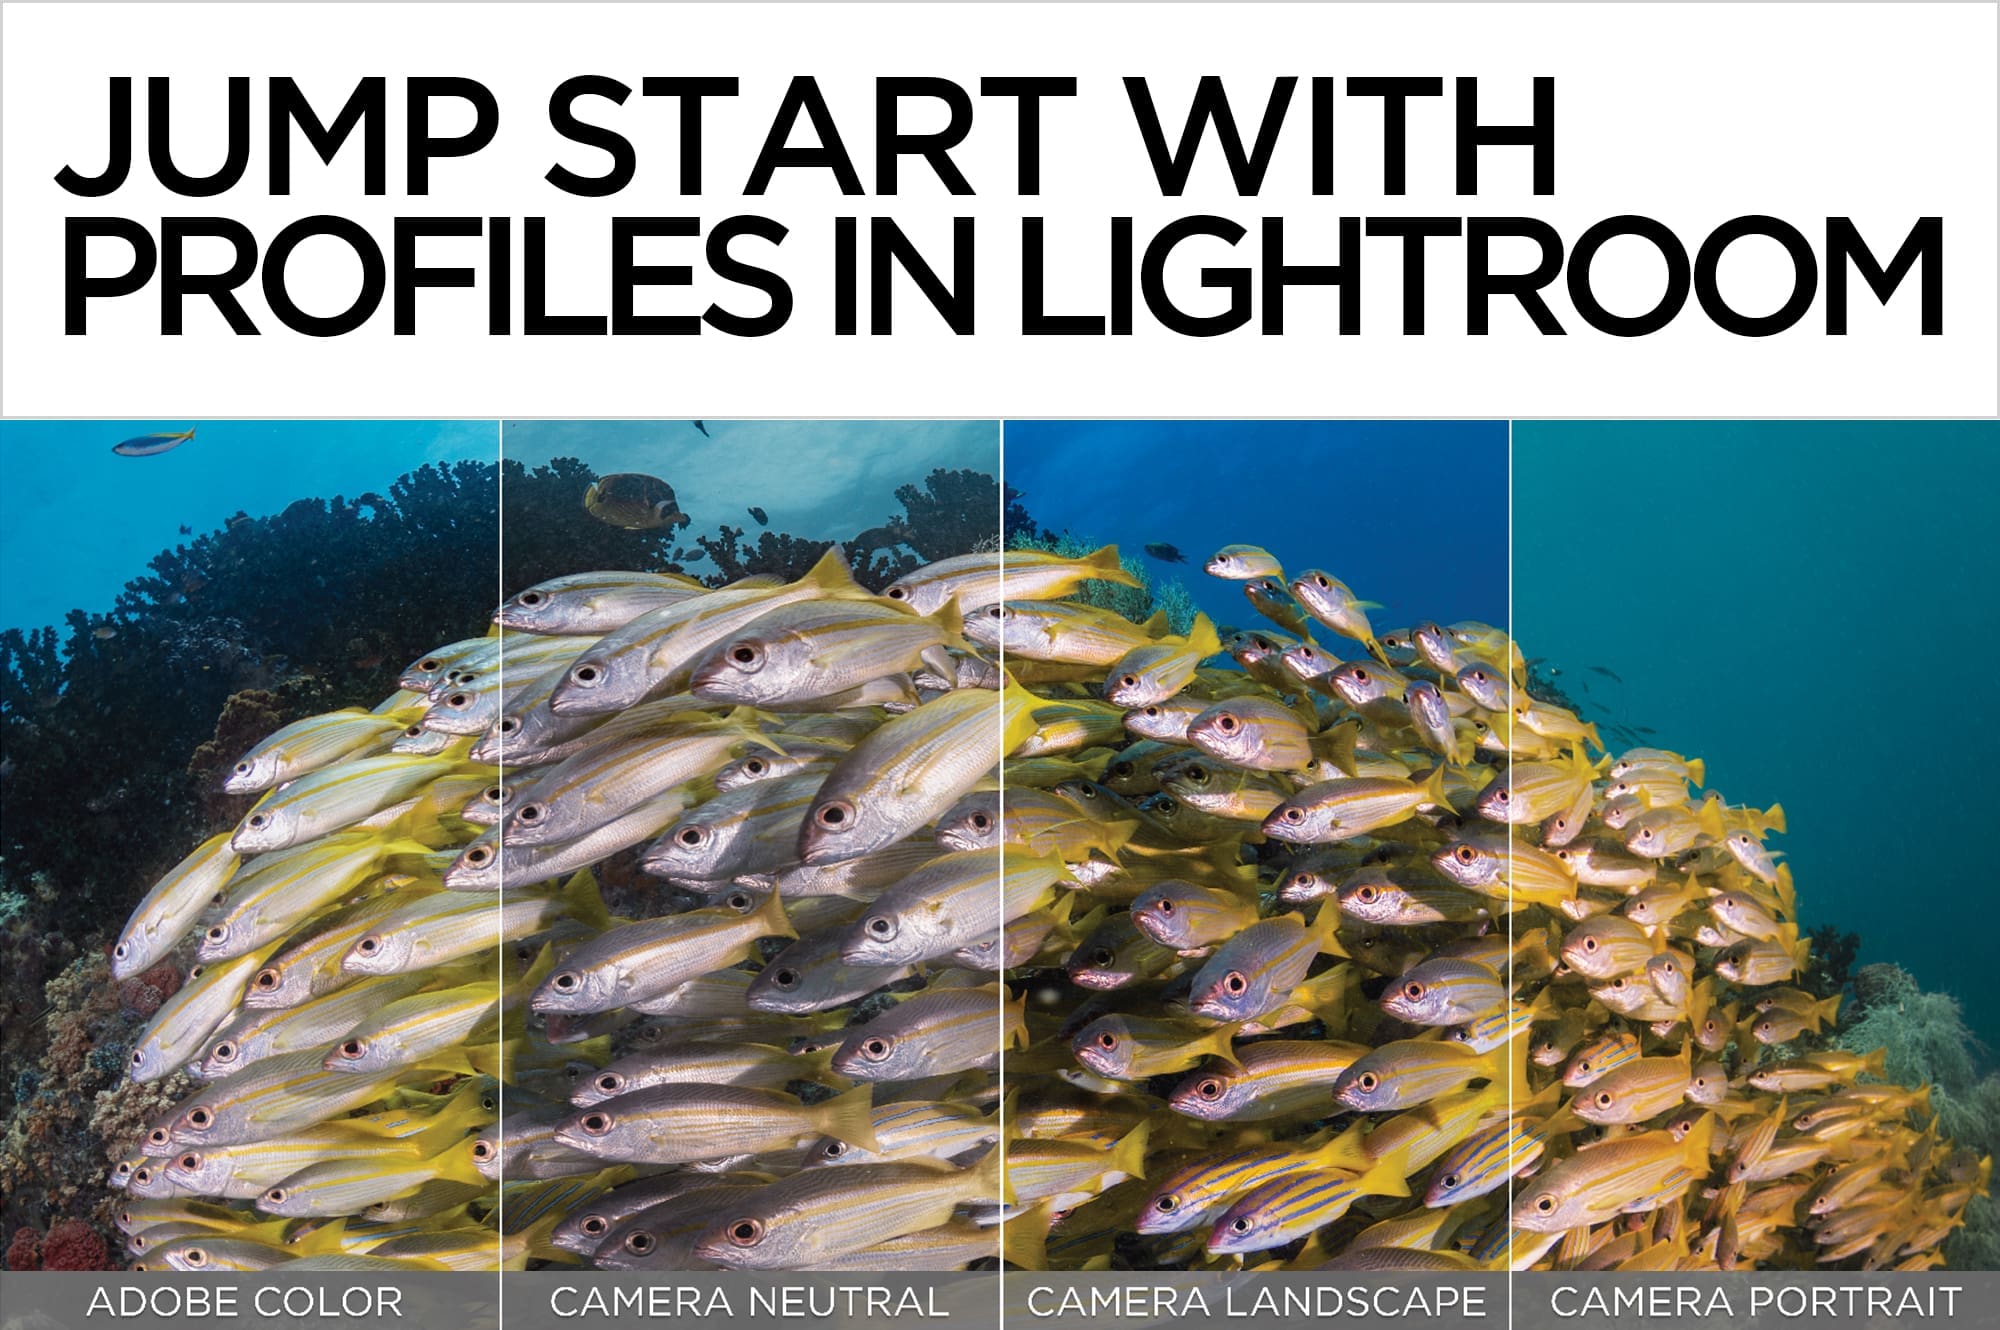
Six new Adobe raw profiles have been added, including the current default, Adobe Color, which adds more contrast and saturation, and more pop to warm colors.
Adobe Monochrome is designed to be a better starting point for B&W photos, with improved tonal separation.
Adobe Portrait is optimized for a wide gamut of skin tones, which isn’t necessarily important for underwater shooters, but it has less contrast than Adobe Color, which may help to hold detail in the Highlights and Shadows.
Adobe Neutral reduces contrast and color boosts to create a very flat starting point, but gives you more editing headroom than other profiles. It’s ideal for photos with tricky blues and gradients.
Adobe Landscape disregards warm tones and enhances blues and greens.
Adobe Vivid is the nuclear option. It’s usually super-saturated, not a starting point I recommend for underwater images.
Camera Matching Profiles
Camera profiles are designed to emulate your camera JPEG. Choose one of these if you liked the image you saw on the back of the camera.
Legacy Profiles
The Legacy Profiles folder contains B&W versions of old profiles, meant to maintain compatibility with edits done in previous versions of Lightroom.
- Creative Profiles for All Files
Creative profiles are designed to create special effects, or a certain “look”. Some of them use 3D lookup tables (LUTs), which allows them to create adjustments that would not be possible using the sliders available in the Develop module.
Modern profiles represent current photographic trends.
Vintage profiles are designed to look more like film.
Artistic profiles are designed to be more edgy, with stronger color shifts.
B&W profiles are optimized for high impact black and white work, offering a range of color channel mixes and tonal adjustments.
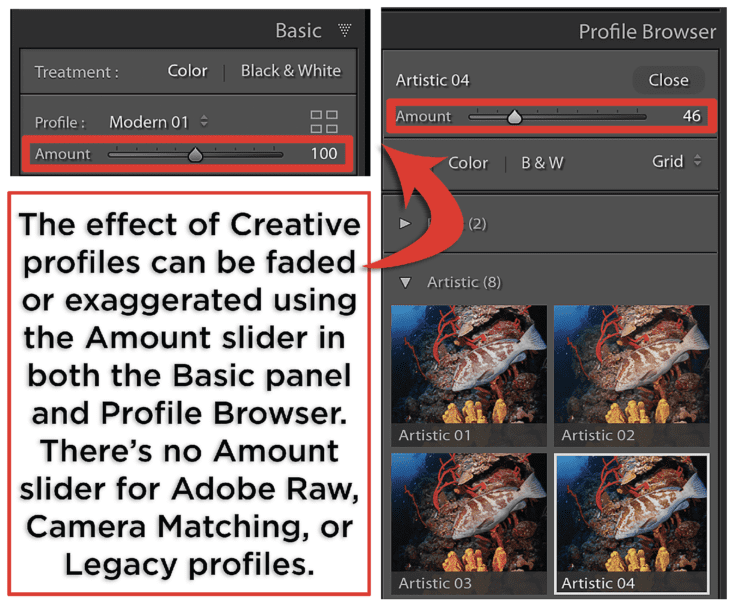
The effect of Creative profiles can be faded or exaggerated using the Amount slider at the top of the Profile Browser panel or Basic panel. An amount of 100 applies the original intended effect. Moving the slider to the left reduces the effect of the profile, and moving it to the right exaggerates the effect.
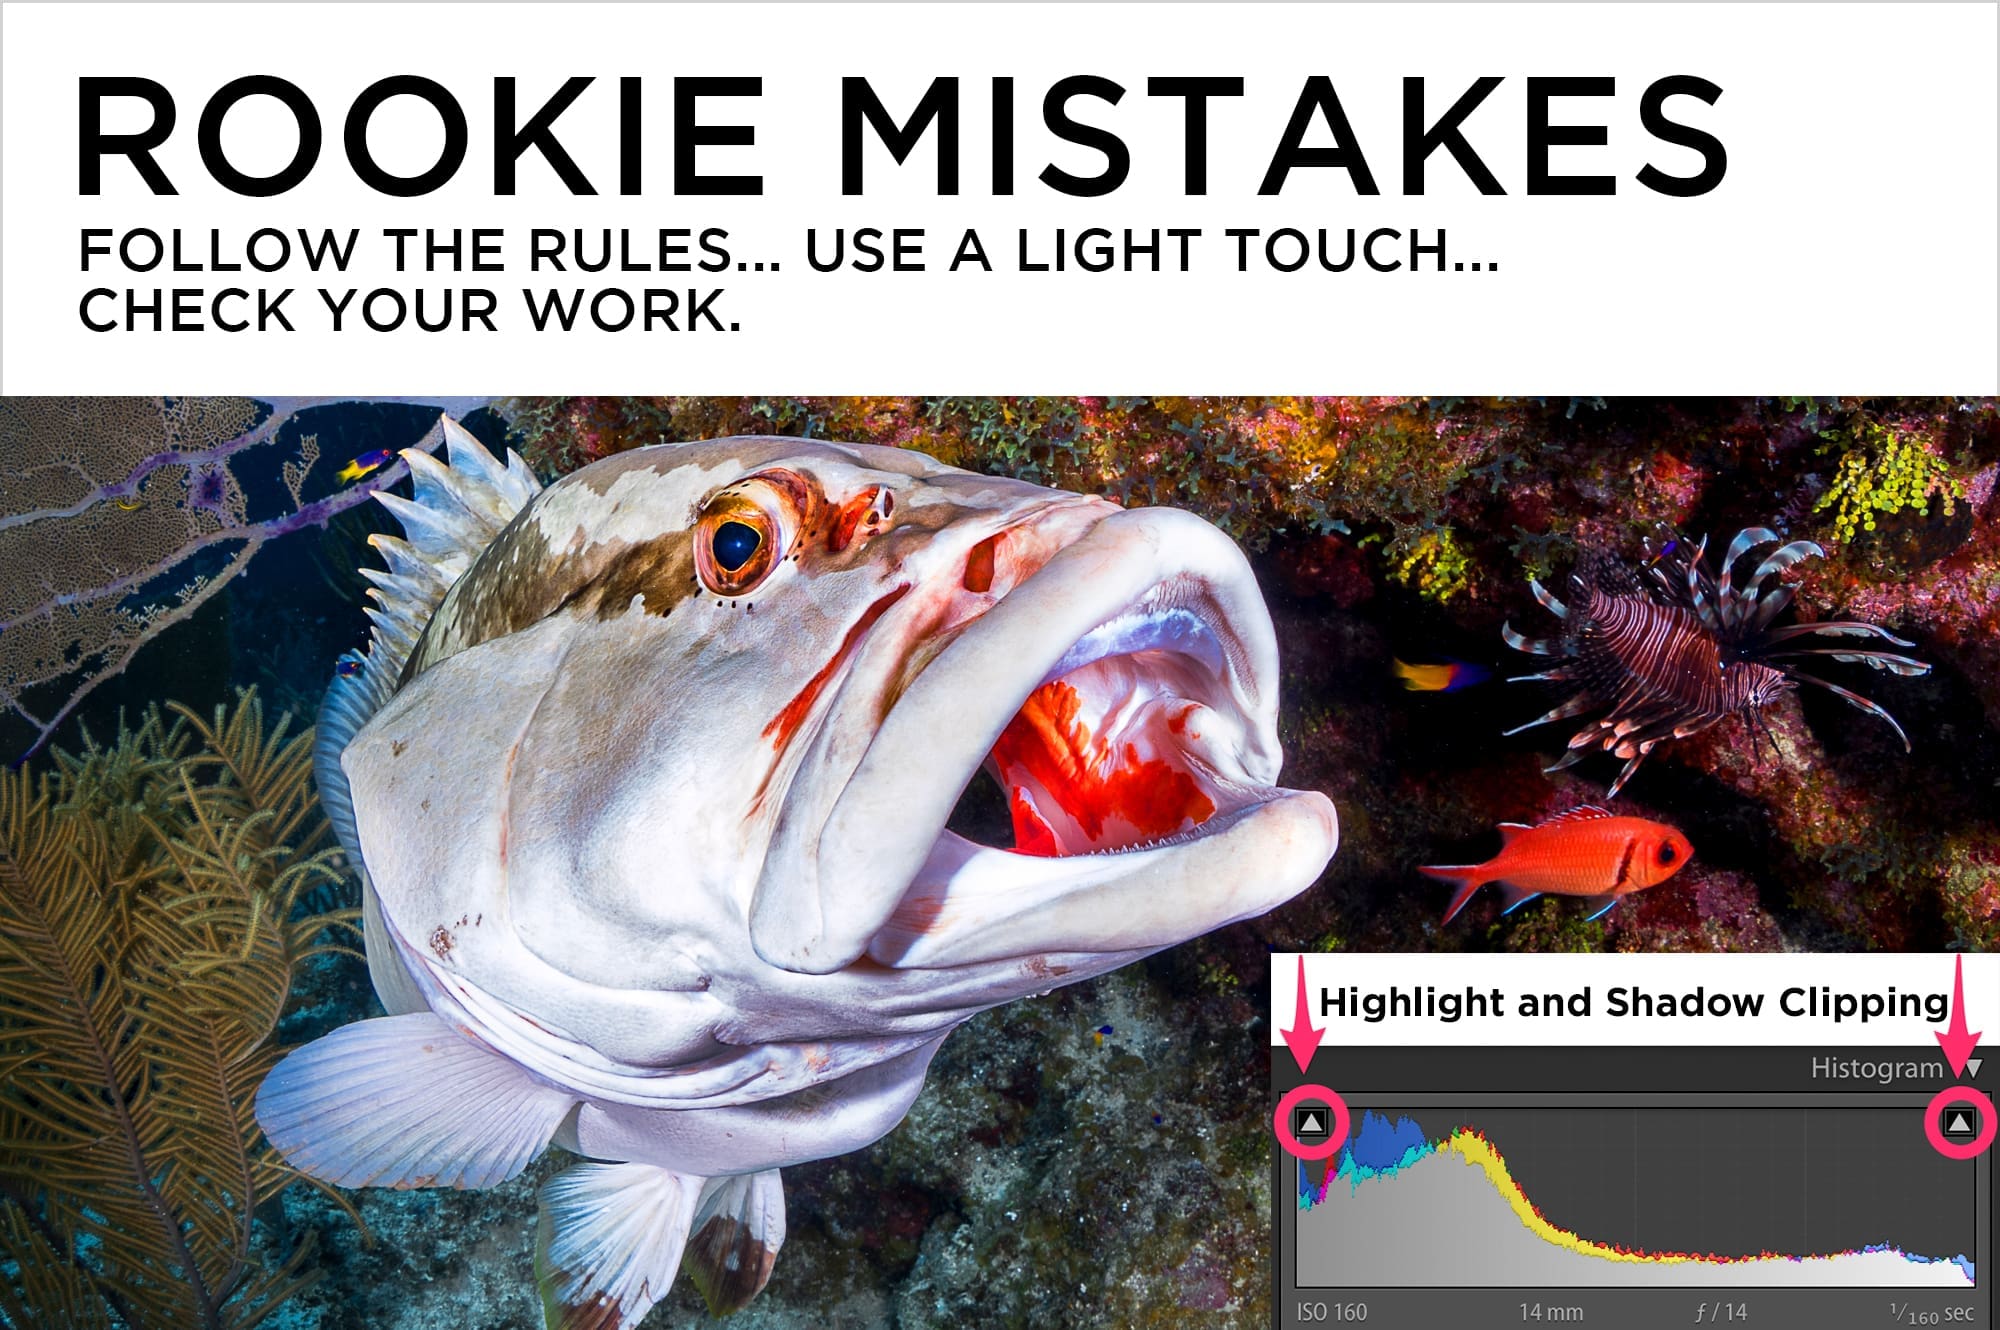
Pro Tip: If an image’s exposure and color are within an acceptable range, then select a profile right off the bat. If the photo is very dark, very bright, or has a noticeable color cast, then fix those problems first in order to clearly see the effect of various profiles.


