Here Comes the Judge – 10 Tips for Winning Photo Contests
As a frequent judge of underwater photo competitions, I’m tasked to evaluate thousands of competing images. It’s rare that the technical merits of an image, though critically important, are the only criteria by which contest winners are ultimately chosen. Sometimes the difference between being a winner or loser simply comes down to the judges’ taste, but often it hinges on an entrant’s understanding (or misunderstanding) of the rules, categories, or themes of the contest. Unfortunately, most photo contests offer no feedback. If you can’t know why you didn’t win, how do you improve your odds for the next contest? These ten tips will help to put you in the judges’ good graces when entering your next underwater photo contest.
- Read the rules, then read them again. It never ceases to amaze me how many otherwise excellent images are disqualified because they don’t comply with rules or eligibility requirements. To reject such a large percentage of non-compliant images in every contest is downright irritating. No doubt some infractions are innocent mistakes, but blatant disregard of the rules is all too common. If you don’t think that judges remember serial rule-breakers, you’re mistaken. When an image is determined to be non-compliant, every other image from that entrant may be subjected to heightened scrutiny, and the word goes out to judges of other contests. Many judges require RAW versions of the finalist’s photos, so save yourself the embarrassment of being branded a cheater and play by the rules.
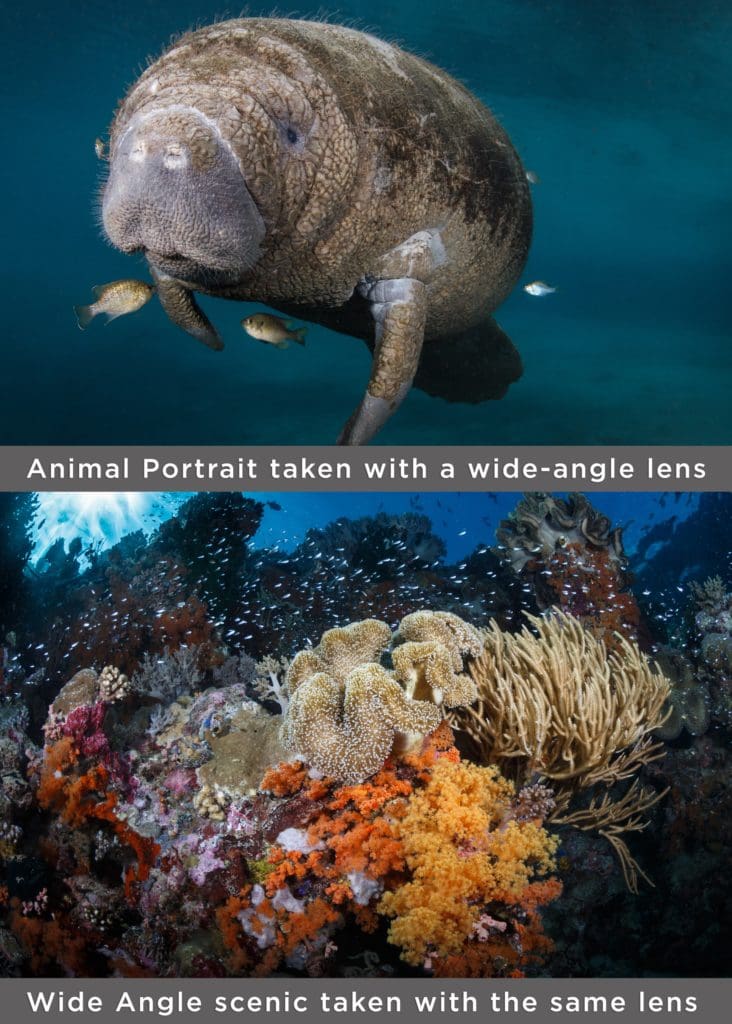
- Enter in the right category. Categories in photo contests are designed to gather entries into like groups. If your photo doesn’t quite fit its category, it’s unlikely to win. A good way of determining whether or not your image stands a chance in its division is to imagine what most other entrants will submit. For instance, even though you may have taken a portrait shot of an animal with a wide angle lens, it may not do well against epic reef scenics in a Wide Angle category. If the category has a theme, assume that a subtle interpretation of that theme won’t carry much weight with the judges. Be obvious.
- Nail the basics. Exposure, composition, and focus are the first elements judges analyze to narrow down the field. This tip seems so obvious that you may be inclined to skip past it, but seriously, folks. You’re entering an image in a contest, not showing it to your Mom. If it’s too dark, overexposed, or most importantly, out of focus, then it’s a non-starter. If your subject has eyes, they have to be sharp. When using focus as a creative or compositional tool, i.e. using shallow depth of field to emphasize an eel’s teeth instead of its eyes, make sure the photo clearly expresses your intentions.

- Don’t enter multiples. Often entrants submit identical or nearly identical takes of the same image in different categories. Sometimes various crops of the same photo, or one color and one B&W version are entered. This sends a mixed message to the judges, often resulting in none of the versions getting the attention it might otherwise garner.
- Think like the judges. Many judges are also photographers. Check out their work to see how and what they shoot – chances are they’ll appreciate images of the same style.
- Be Original. There are many pygmy seahorse shots out there. How can you take a pygmy shot that will show contest judges something new? A photo that elicits an emotional response will stand out – so will an image that tells a story. Holding yourself to the high standard of producing unique images will keep you ahead of the pack.
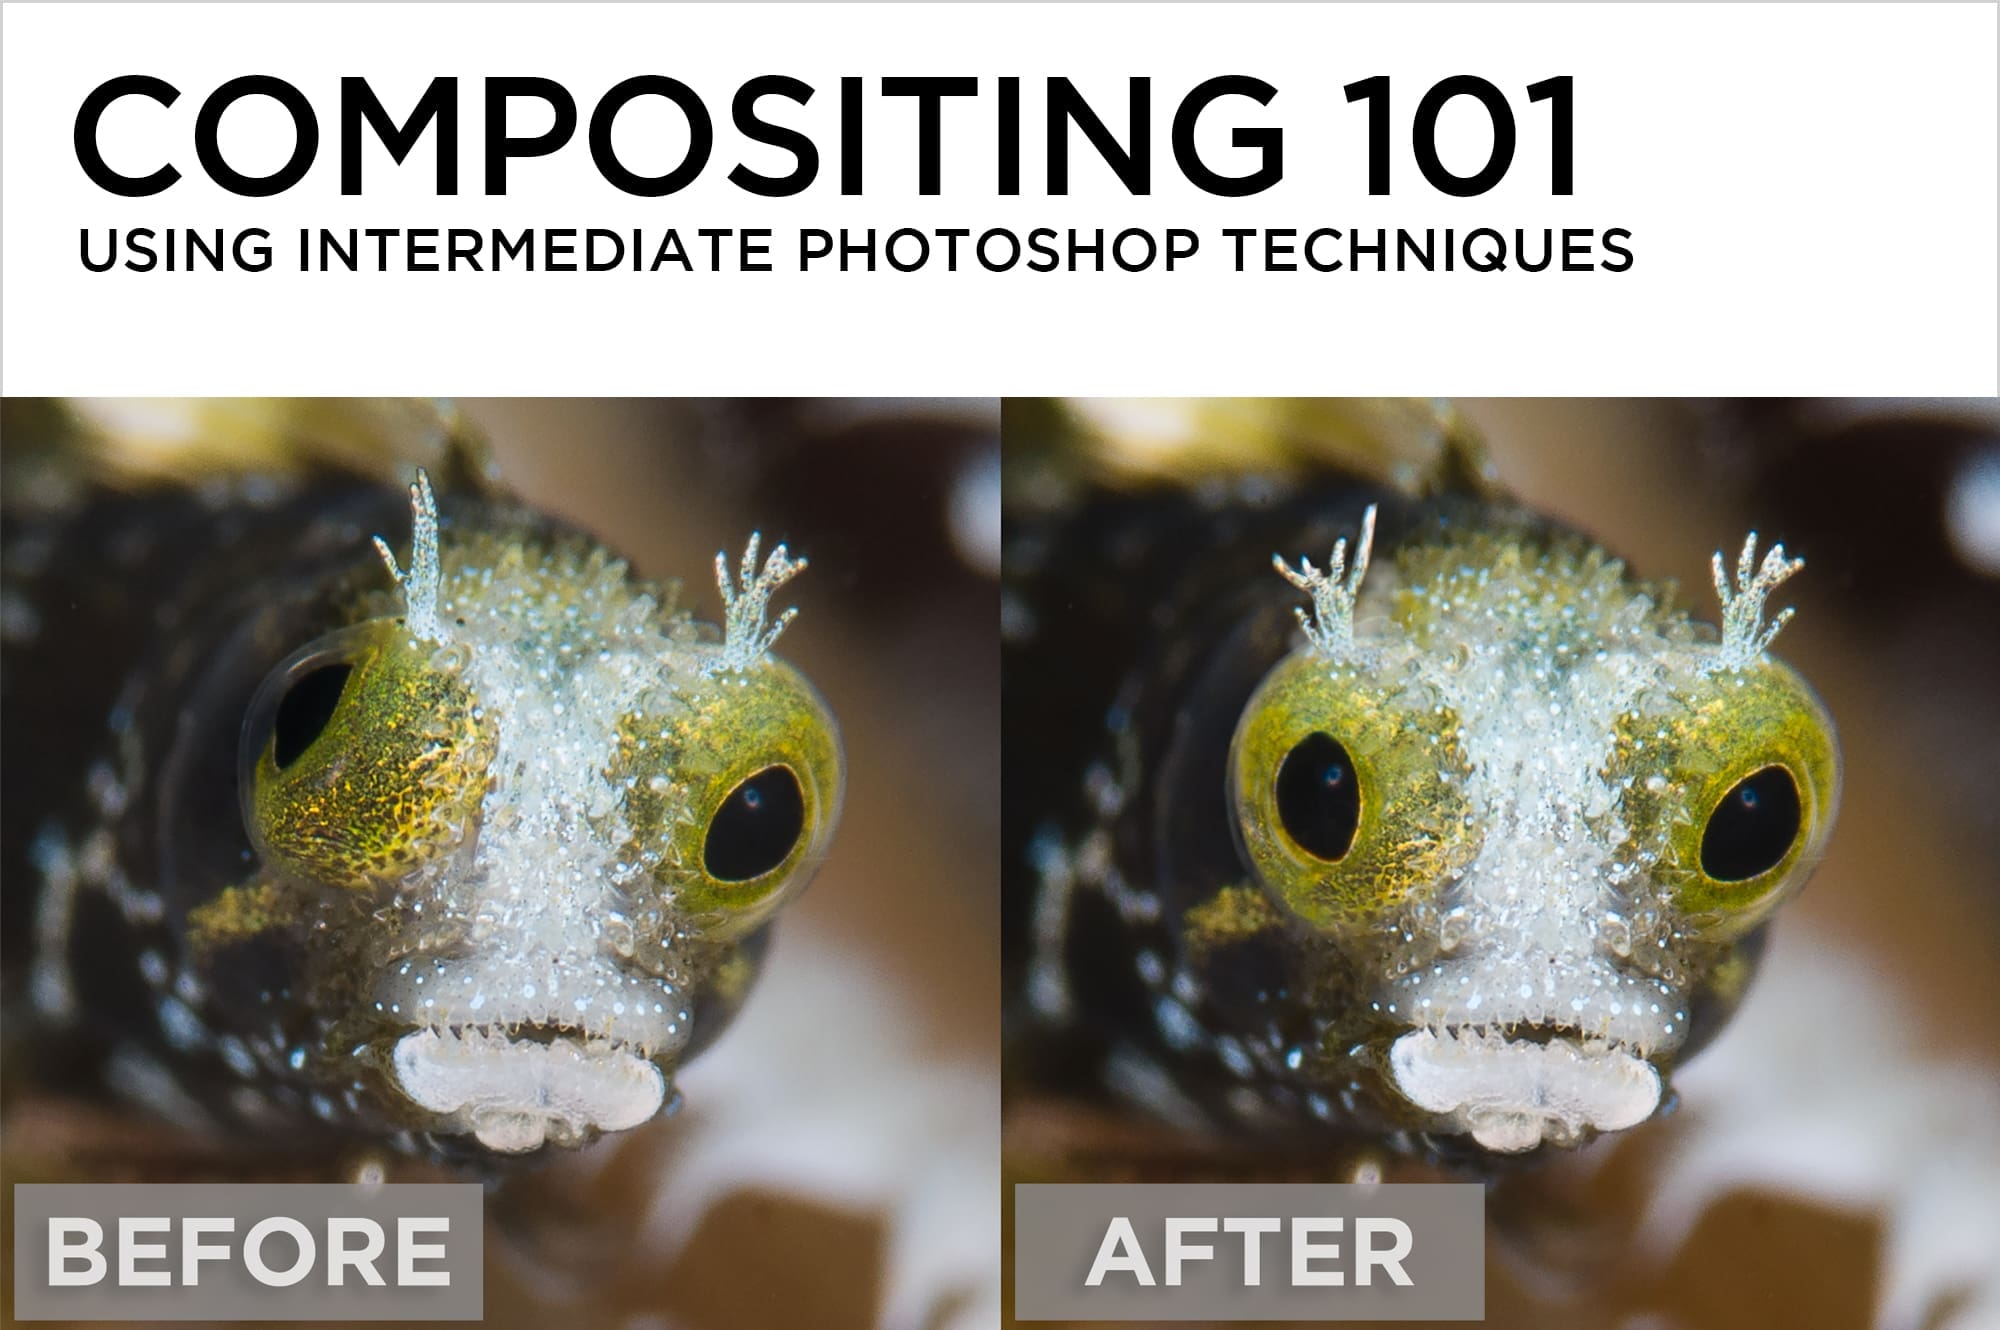
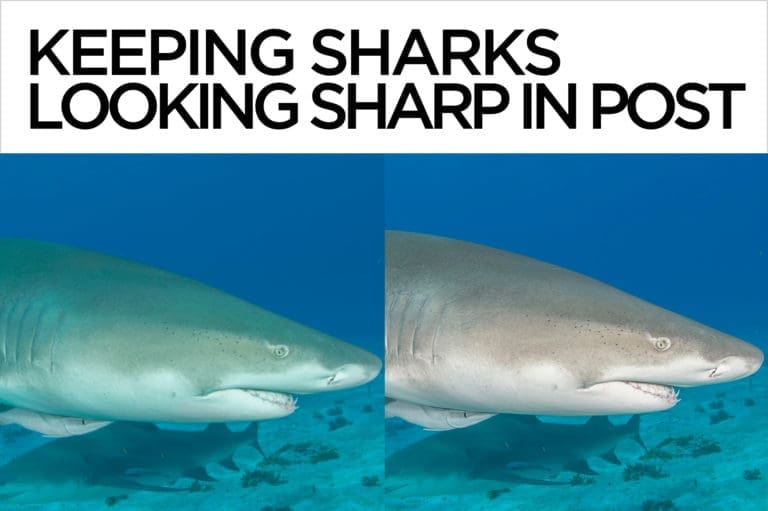
- Easy on the Editing – Most underwater photo contests strive to keep the emphasis on photographic, not Photoshop skills. LR and Photoshop’s mind-boggling array of seemingly magical tools can be used for good or evil. Tools that lead directly to the dark side if not applied with a light touch are the Blacks slider, Clarity, and Dehaze.
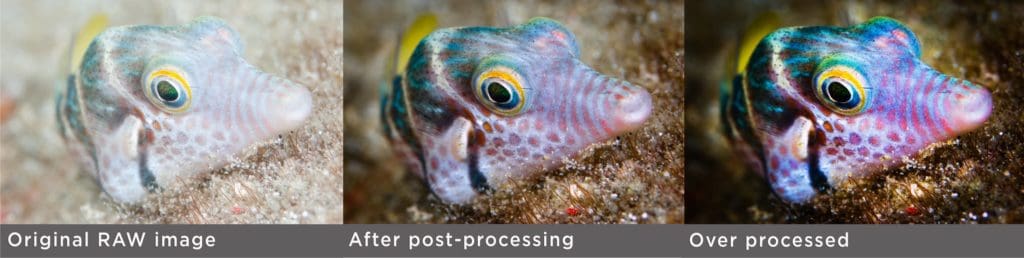
- Check your work. Judges look at contest entries at 100% magnification, and you should too. If you’ve done significant spot removal or compositing, it’s important to examine the image for telltale traces of your work. In Lightroom, make a virtual test copy and dial up the Exposure, Shadows, or Blacks to make sure your photo is free from unwanted artifacts.
- Ask for opinions before entering. Social media is a fantastic place to ask for constructive criticism and can help you decide which images are the strongest. Be brave. It’s a good lesson to learn that your personal favorites aren’t always the shots with the most impact.
- Keep trying. Judges don’t always agree. A winning image in one contest may not be selected or make the finals in other contests. Don’t expect even a great image to be recognized in every contest, and above all remember – it’s not personal! Entering contests is an effective way of challenging yourself to grow as a photographer.