Five Invaluable (but hidden) Lightroom Features
As Lightroom evolves, new functionality is added to what’s already a stunningly deep piece of software. Showy new features get lots of exposure, but subtler components of an update may go unheralded, quickly becoming “hidden” features that only the most avid users are hip to. In addition, common tools in each module often have a “deep state” – alternate views, keyboard shortcuts, and hiding-in-plain-sight functionality that remain undiscovered by most users.
-
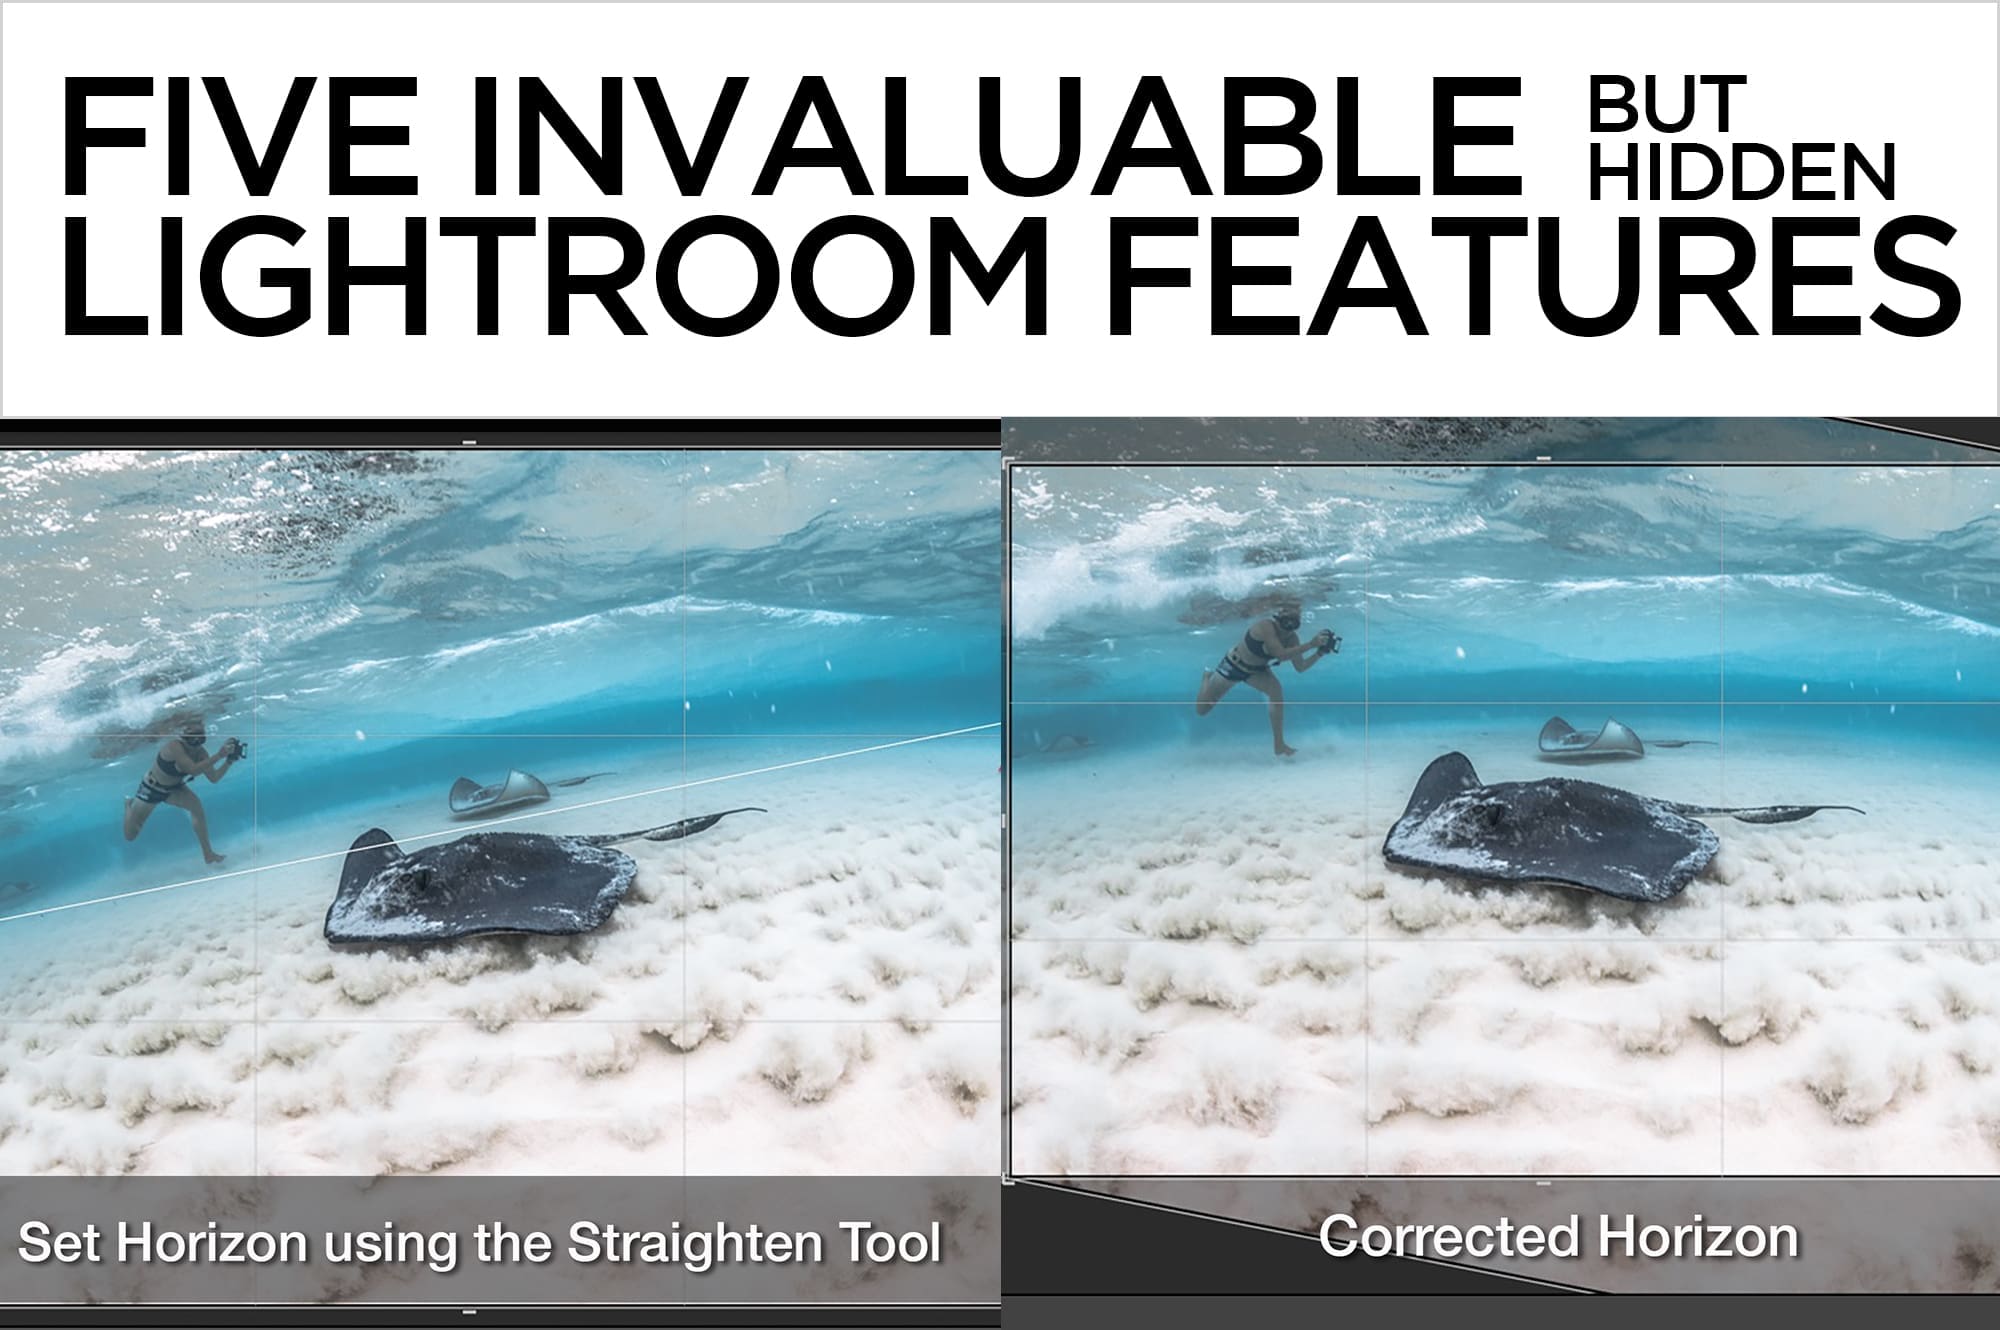
Level the horizon with the Straighten tool
Most Lightroom users have noticed the Straighten tool icon in the Crop Overlay panel without putting it into action. When used correctly, the Straighten tool does a fast and accurate job of leveling any object or horizon.
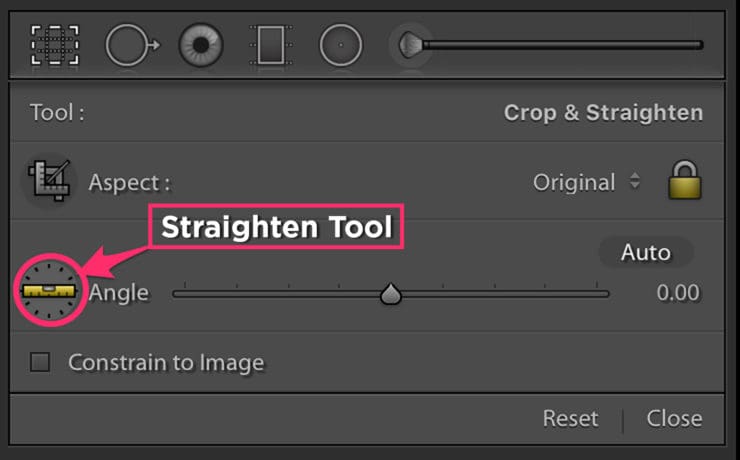
- Click on the Straighten tool icon, mouse into the image and click on one edge of the horizon to set an endpoint, then drag to the opposite edge, releasing the Straighten tool in order to set the other endpoint. Lightroom will automatically level the line between the two endpoints.
- The Straighten tool can be activated temporarily from the regular Crop tool by holding down Command (Mac) or Control (PC).
-
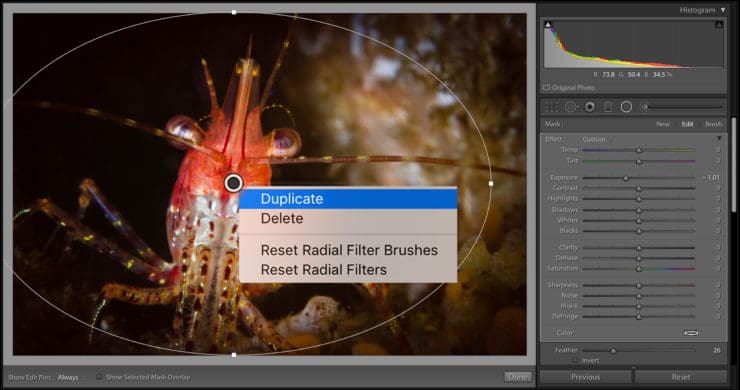
Hidden filter features
Not-so-well-documented keyboard shortcuts enable all kinds of extended functionality for the already powerful radial and graduated filters.
- With a Radial or Graduated filter active, hit the apostrophe key (‘) to invert or uninvert a radial filter, and to flip the orientation of a graduated filter.
- To create multiples of the same filter, Control-click (Mac) or right-click (PC) and choose “Duplicate” from the ensuing contextual menu. Any effects applied to the original filter will double up, but you won’t see two separate pins unless you nudge the duplicate filter’s edit pin to reveal the original pin hidden beneath.
- To automatically create a Radial filter that fills the entire image, Command (Mac) or Control (PC) double-click anywhere in the image. This is a great starting point for building a custom vignette.
-
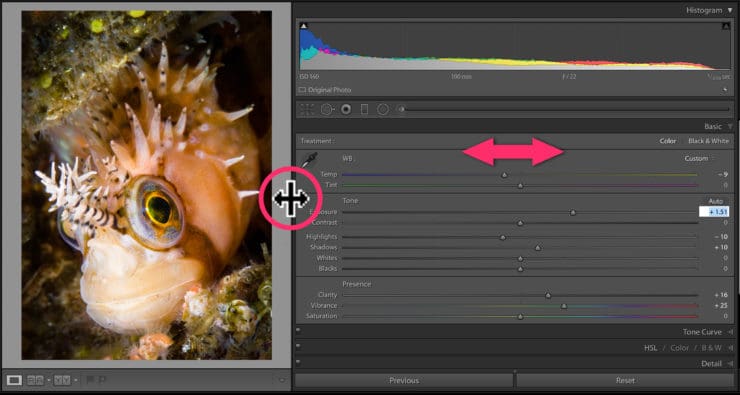
Make Develop Module sliders more responsive
It’s difficult to make subtle changes with sliders if the Develop Module panels are narrow, especially when editing on a laptop. Widening the tool panels stretch the slider bars, making more precise adjustments possible.
- Move the cursor over the inside edge of a panel. It will turn into a small double-headed arrow icon.
- While holding down Opt (Mac) or Alt (PC), click and drag the edge of the panel inward to widen it. The sliders will be much more responsive once they have more room to play.
- To adjust the sliders incrementally using keyboard commands, click in the slider’s numeric text box and use the up and down arrow keys on your keyboard to increase or decrease the settings.
-
Alternate Views
Lightroom’s Develop Module is chock-full of keyboard shortcuts that reveal alternate views of the photo. Some display edge detail, some display clipping, but all are designed to help make more specific edits than are possible with just the default views.
- In the Basic panel, hold down the Opt/Alt key while dragging the slider handle for Exposure, Highlights, Shadows, Whites, or Blacks to reveal a clipping preview that helps to visualize clipping (loss of data) from either bright or dark tones.
- In the Sharpening tab of the Detail panel, hold down the Opt/Alt key while dragging the slider handle for Amount, Radius, Detail, or Masking to reveal various grayscale versions of the photo’s edges and texture.
- When using the new Color range masking feature, hold down the Opt/Alt key and drag on the Amount slider to see a black and white preview of the mask. Use the same shortcut on the Smoothness slider while using Luminance range masking. This view makes masking much more intuitive than while looking at the red overlay!

-
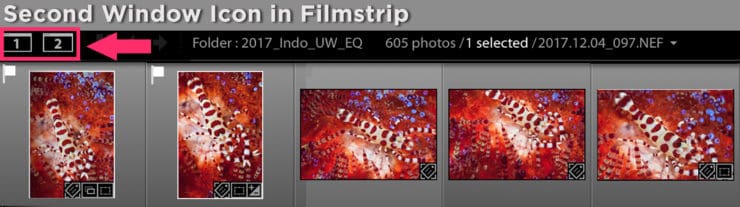
Second Window
You don’t have to have a second monitor hooked up to get the benefit of a second display window in Lightroom. Second Window controls are found in the top-left corner of the Filmstrip, where you can see two buttons: one marked “1” for your main display, “2” for the second display. When you click the Second Window button, it brings up a separate floating window that behaves independently of your main screen.
- Second Window is module agnostic – it doesn’t belong to any specific module, so you can access the functionality of Grid, Loupe, Compare, and Survey Views from anywhere in Lightroom.
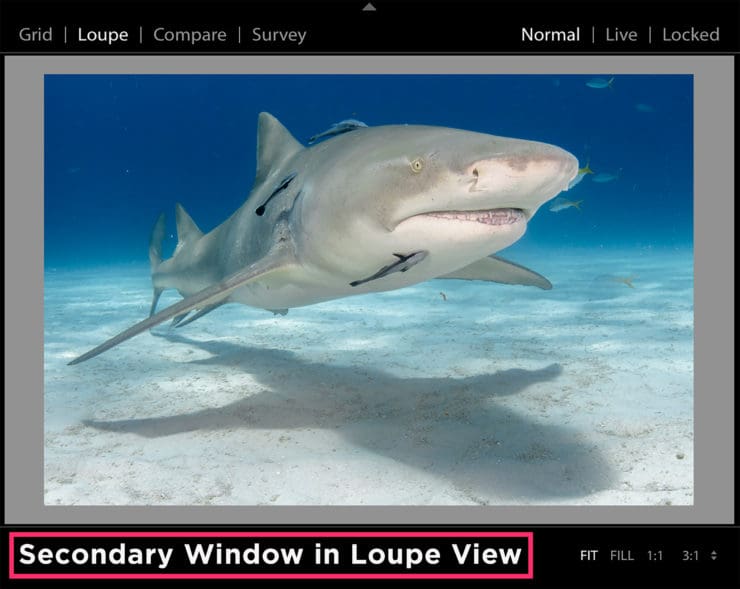
- In Loupe View, Second Window has three modes – Normal, Live, and Locked.
Normal mirrors the image that’s selected in the grid of the Lightroom Library.
Live shows whatever image the mouse/cursor is hovering over.
Locked shows the currently displayed photo no matter what is selected in the grid.
- In Loupe View, the same magnifications that exist in the Navigator of the Library Module are accessible at the bottom right of the Second Window, making it possible to see two different magnifications simultaneously, even of multiple images.
Pro Tip
Be adventurous! Experiment with unfamiliar tools to see how they apply to underwater images. Most Lightroom users barely scratch the surface of Lightroom’s powerful “deep state”. For more detailed information on the features mentioned above, check out these tutorials.