Puppet Warp
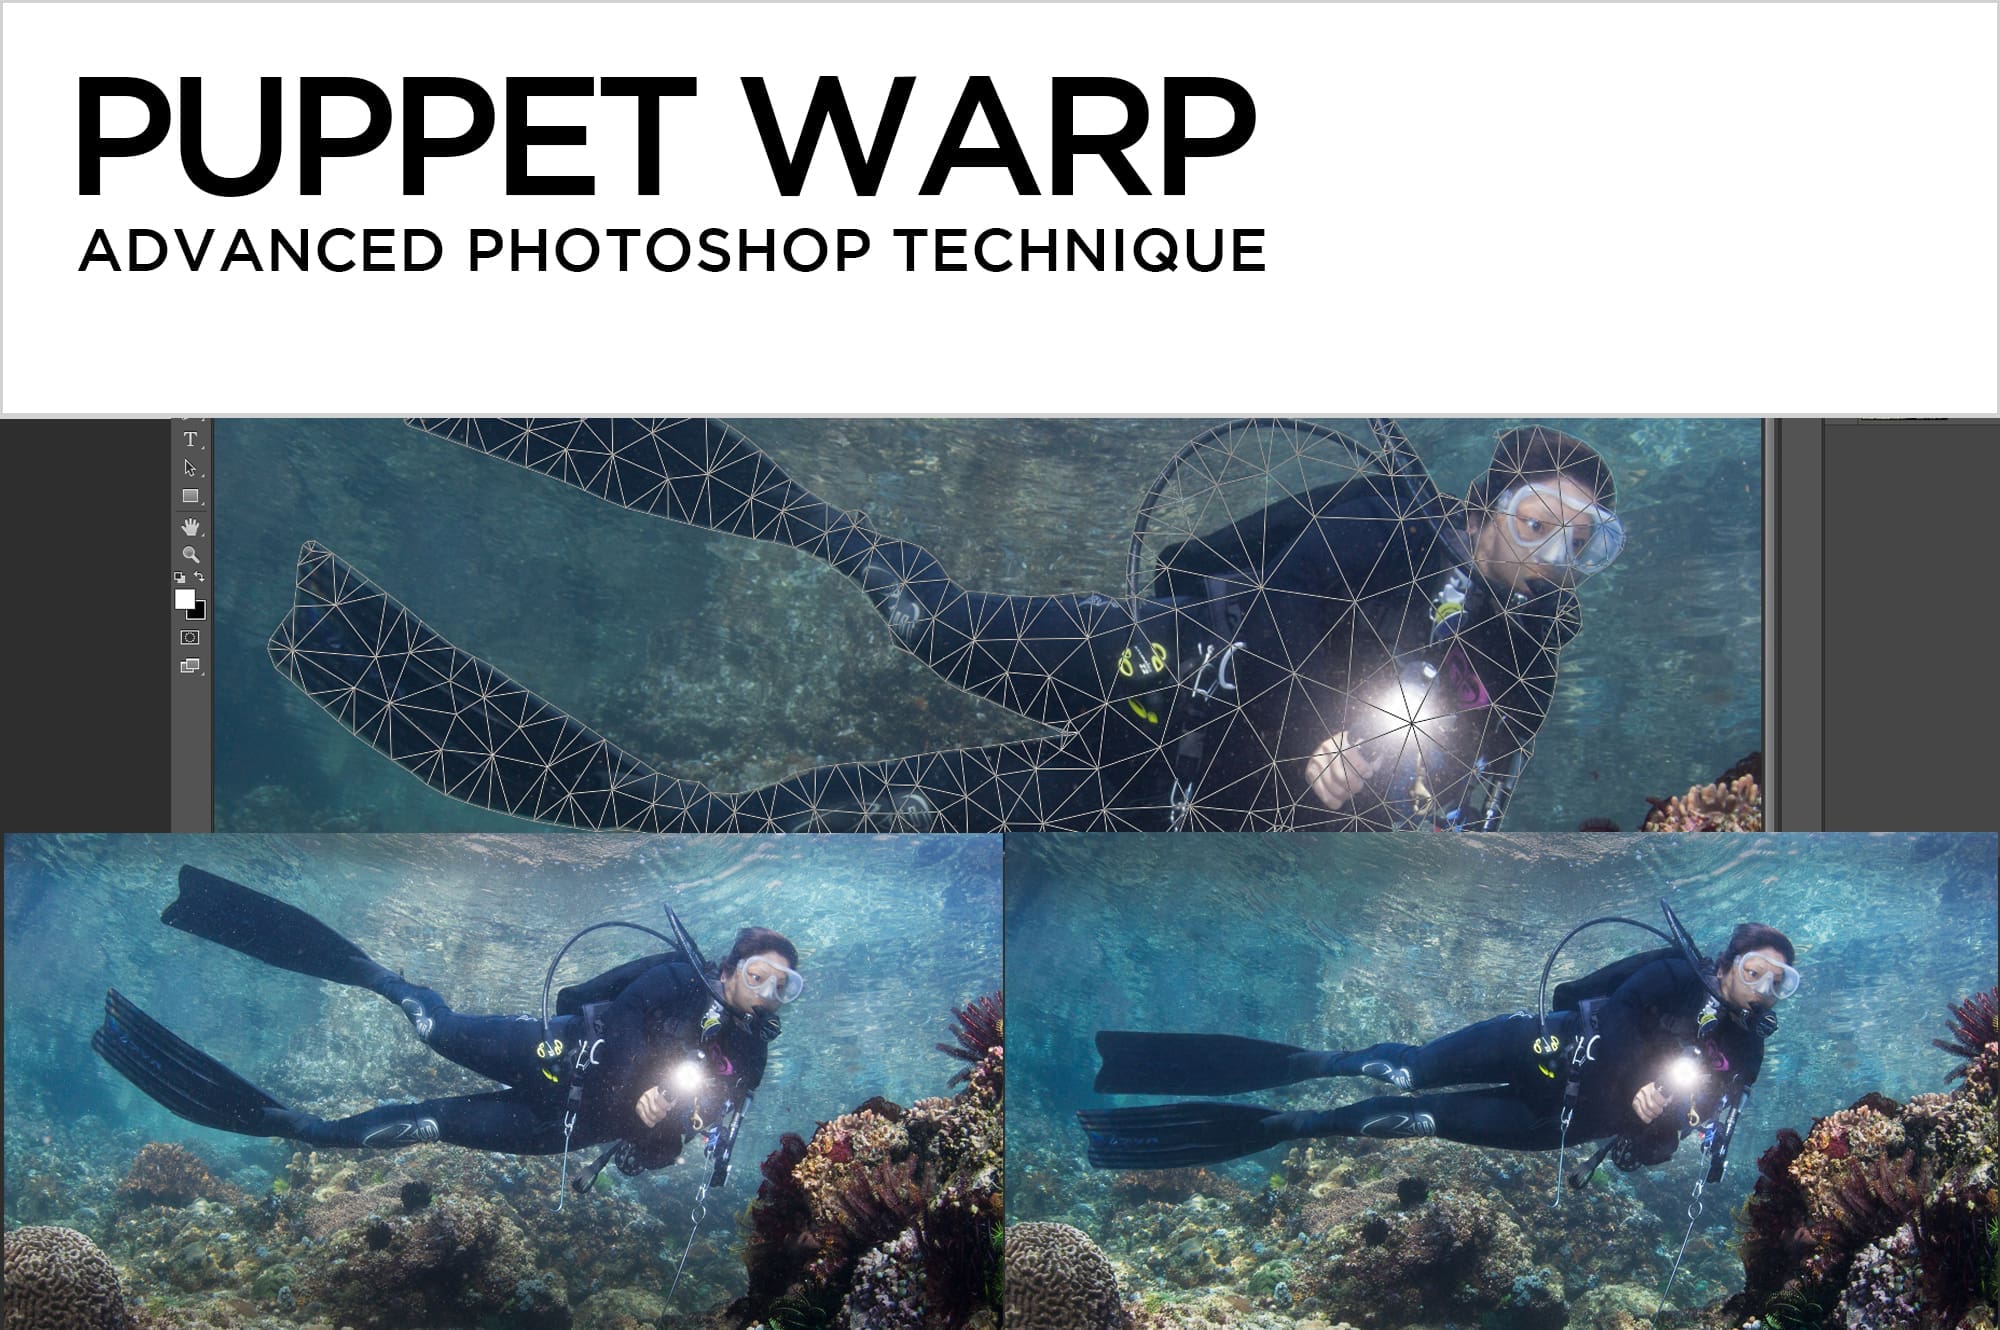
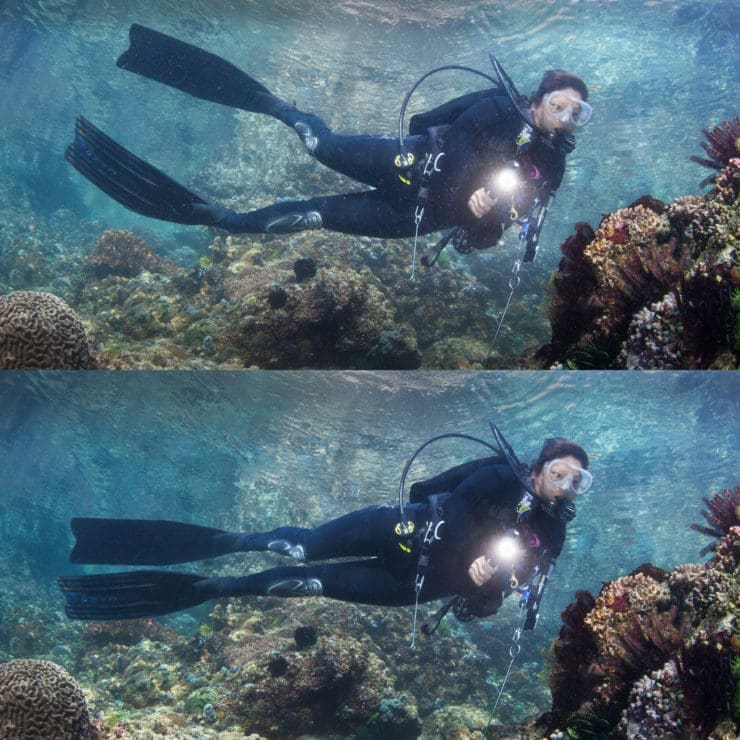
Let’s take a look at an advanced technique in Photoshop that purists would consider a cheat, but is a fantastic tool for those not so worried about bending reality. It’s called Puppet Warp. The goal in this example is to change the fin position of a model, but it’s great for all kinds of adjustments, big and small, that can significantly improve the impact of an image.
A video tutorial of this technique is available here:
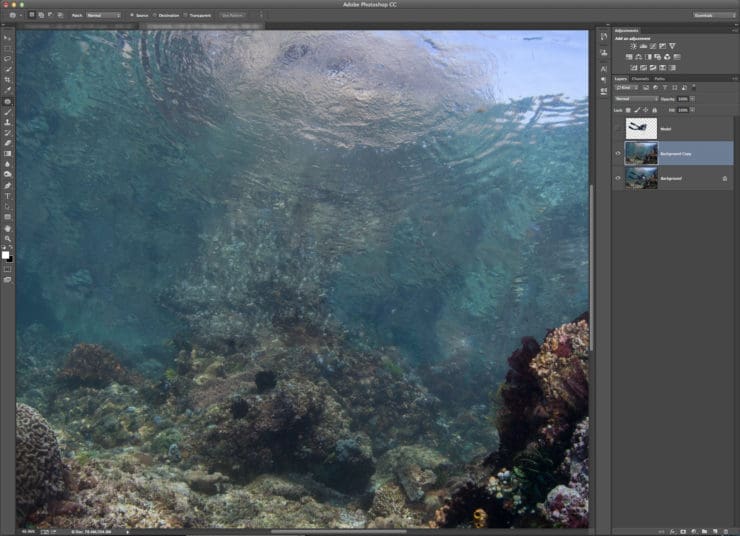
- Open the image in Photoshop and duplicate the Background layer. The keyboard shortcut is CMD/CTRL – J.
- Select the model with a selection tool of your choice. An accurate selection at this point will mean less work later, but it doesn’t have to be perfect.
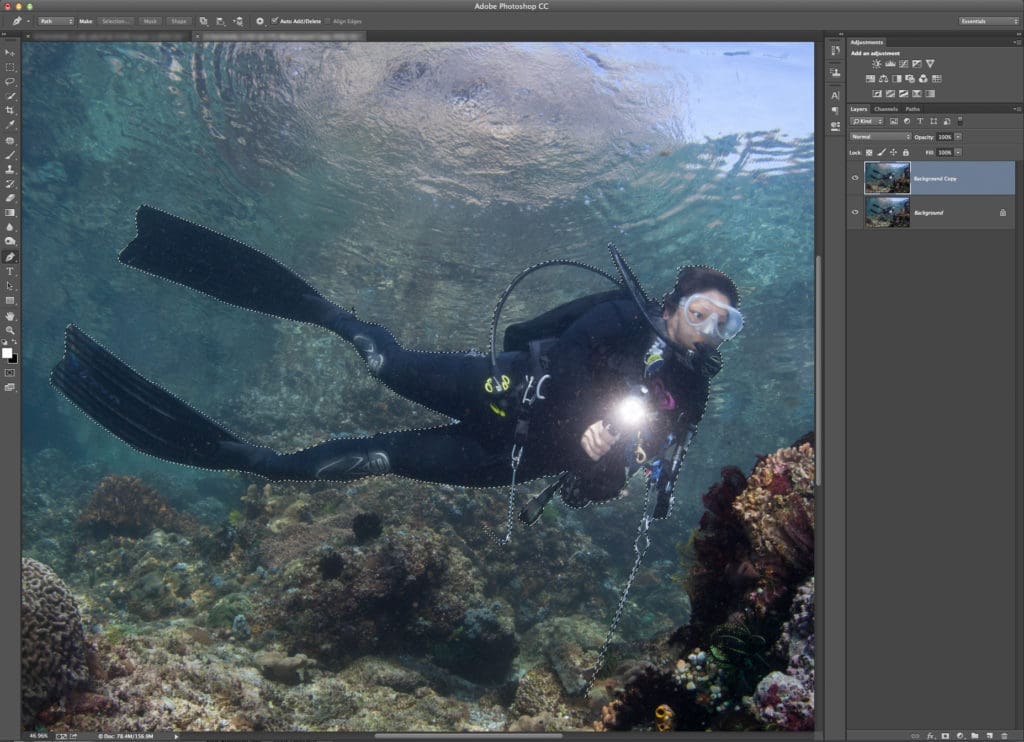
- With the selection around the model active, CMD/CTRL-J to put the model into her own layer.
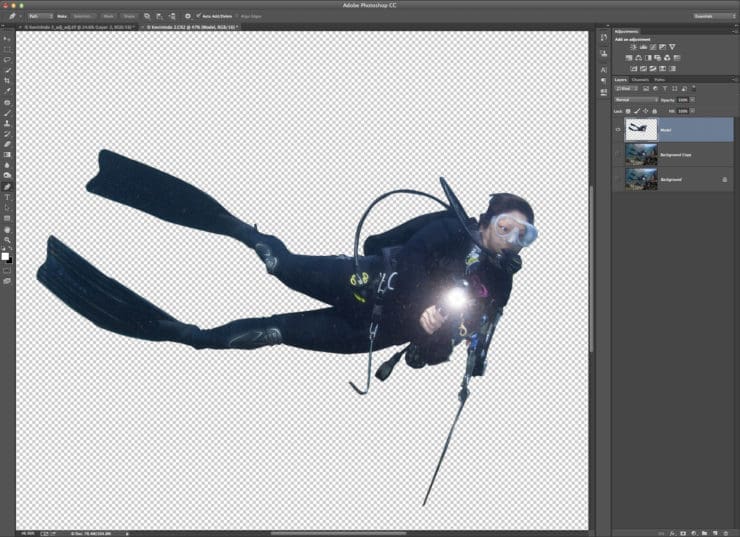
- Turn off the visibility of the model layer. Clicking the Eyeball on the left side of the layer toggles its visibility on and off. You wont see the image change, because the pixels are exactly duplicated underneath.
- CMD/CTRL – CLICK on the thumbnail of the Model layer to re-activate the selection.
- With the Background Copy layer active, use the keyboard shortcut Shift-Delete/Shift-Backspace to summon the Fill Dialog Box. You can also access the it box from Edit>Fill on Photoshop’s main menu.
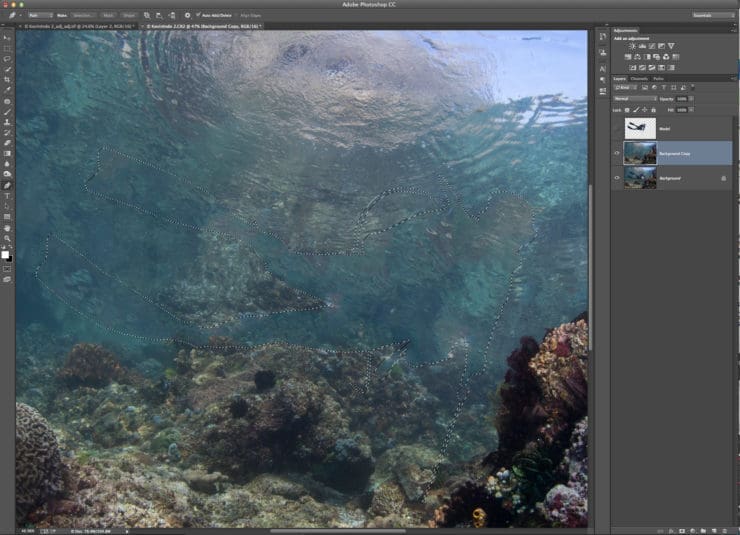
Choose Content Aware Fill from the drop down menu, and hit OK. Combine the result of Content Aware Fill with other cloning and healing tools to remove the model, at the same time rebuilding the background behind her.
Content Aware Fill analyzes the pixels in the image and decide’s what’s needed to fill in the reef behind the model. Though it’s a mind-blowingly powerful tool, most images require a bit of additional clean-up after it’s been applied. How well Content Aware Fill works depends in large part on the complexity of your picture. On a blue water background it does an amazing job right out of the gate, but if there’s reef or other structure in the selected area, you’ll have to use a little elbow grease to make it look good. I followed up here with the healing brush and patch tool. Make sure to check your work at 1:1.
- Toggle the visibility of the Model layer back on, and make that layer active. Go to Edit>Puppet Warp. On the Puppet Warp Tool Bar you’ll find options to hide and show mesh, to make the mesh more or less dense, and to choke or expand the selection. Until you’re better acquainted with the tool, I recommend sticking with the default settings, with the exception of the mesh visibility, which I toggle off from time to time to have a better view of what I’m doing.
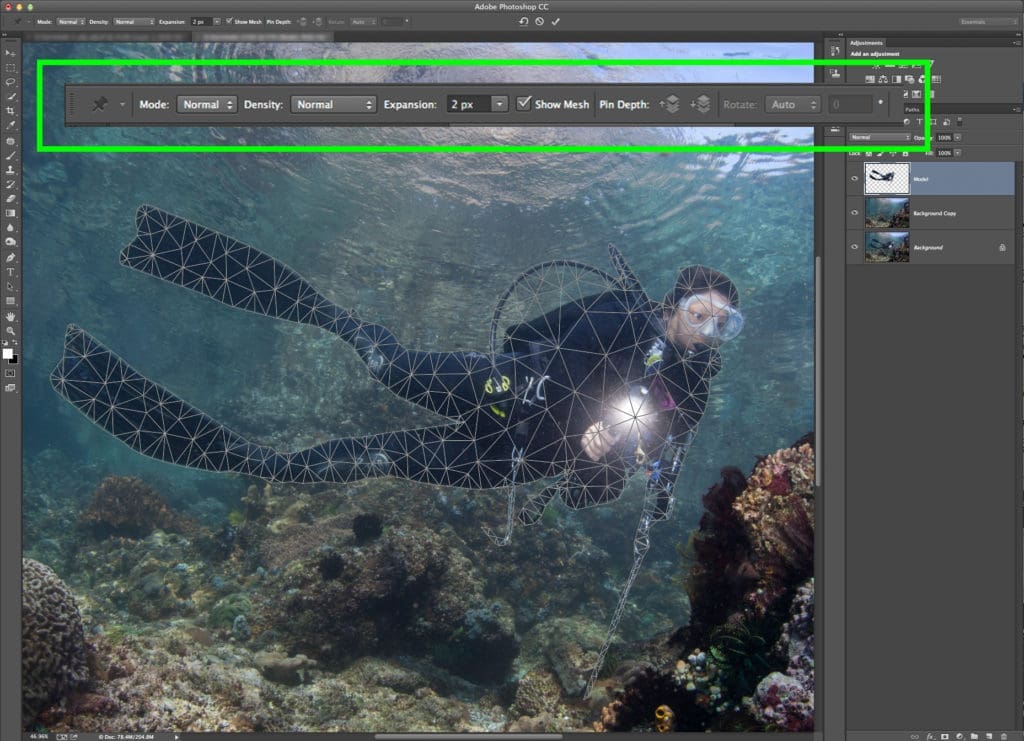
- Each time you click on the mesh, you add a pin that locks down that area of the image. You don’t need many to do the trick. I put one near the top of her head, in the middle of her torso, then a couple more at the shoulders and hips to keep those areas from moving. A selected pin has a white center.
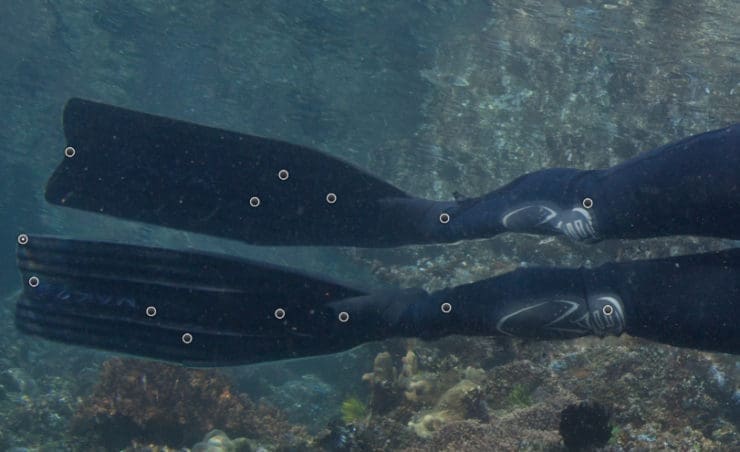
- Next add pins along her legs at the joints and onto her fins. Click on a pin to activate it and drag it to move that part of the image into position. You can manipulate more than one pin at a time by clicking on the first to select it, then Shift-clicking on subsequent pins. You can delete pins by holding down OPT/ALT and clicking when you see the cursor turn into a little pair of scissors.
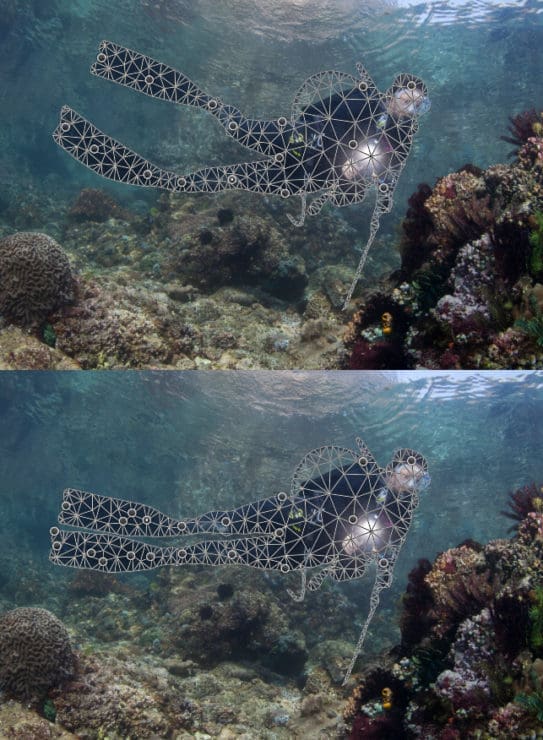
- Keep adding pins to make more specific adjustments until it looks right.
- When you’re finished adjusting the model’s pose, zoom in to at least 100% and check your work. Click the checkmark at the top of the screen to commit the changes, and touch up the background if needed.
Many thanks to Kevin Ferrero and Jennifer Penner for allowing me to use this image.