Take Your RAW Adjustments to Eleven

Why take your RAW adjustments to eleven? Because it’s one louder than ten, as Spinal Tap’s Nigel Tufnel so aptly puts it. The expression “taking it to eleven” refers to the act of taking something to an extreme, and although I usually don’t recommend taking post-processing to an extreme, there are times when a little extra juice from Adobe Camera Raw (ACR) really does the trick.
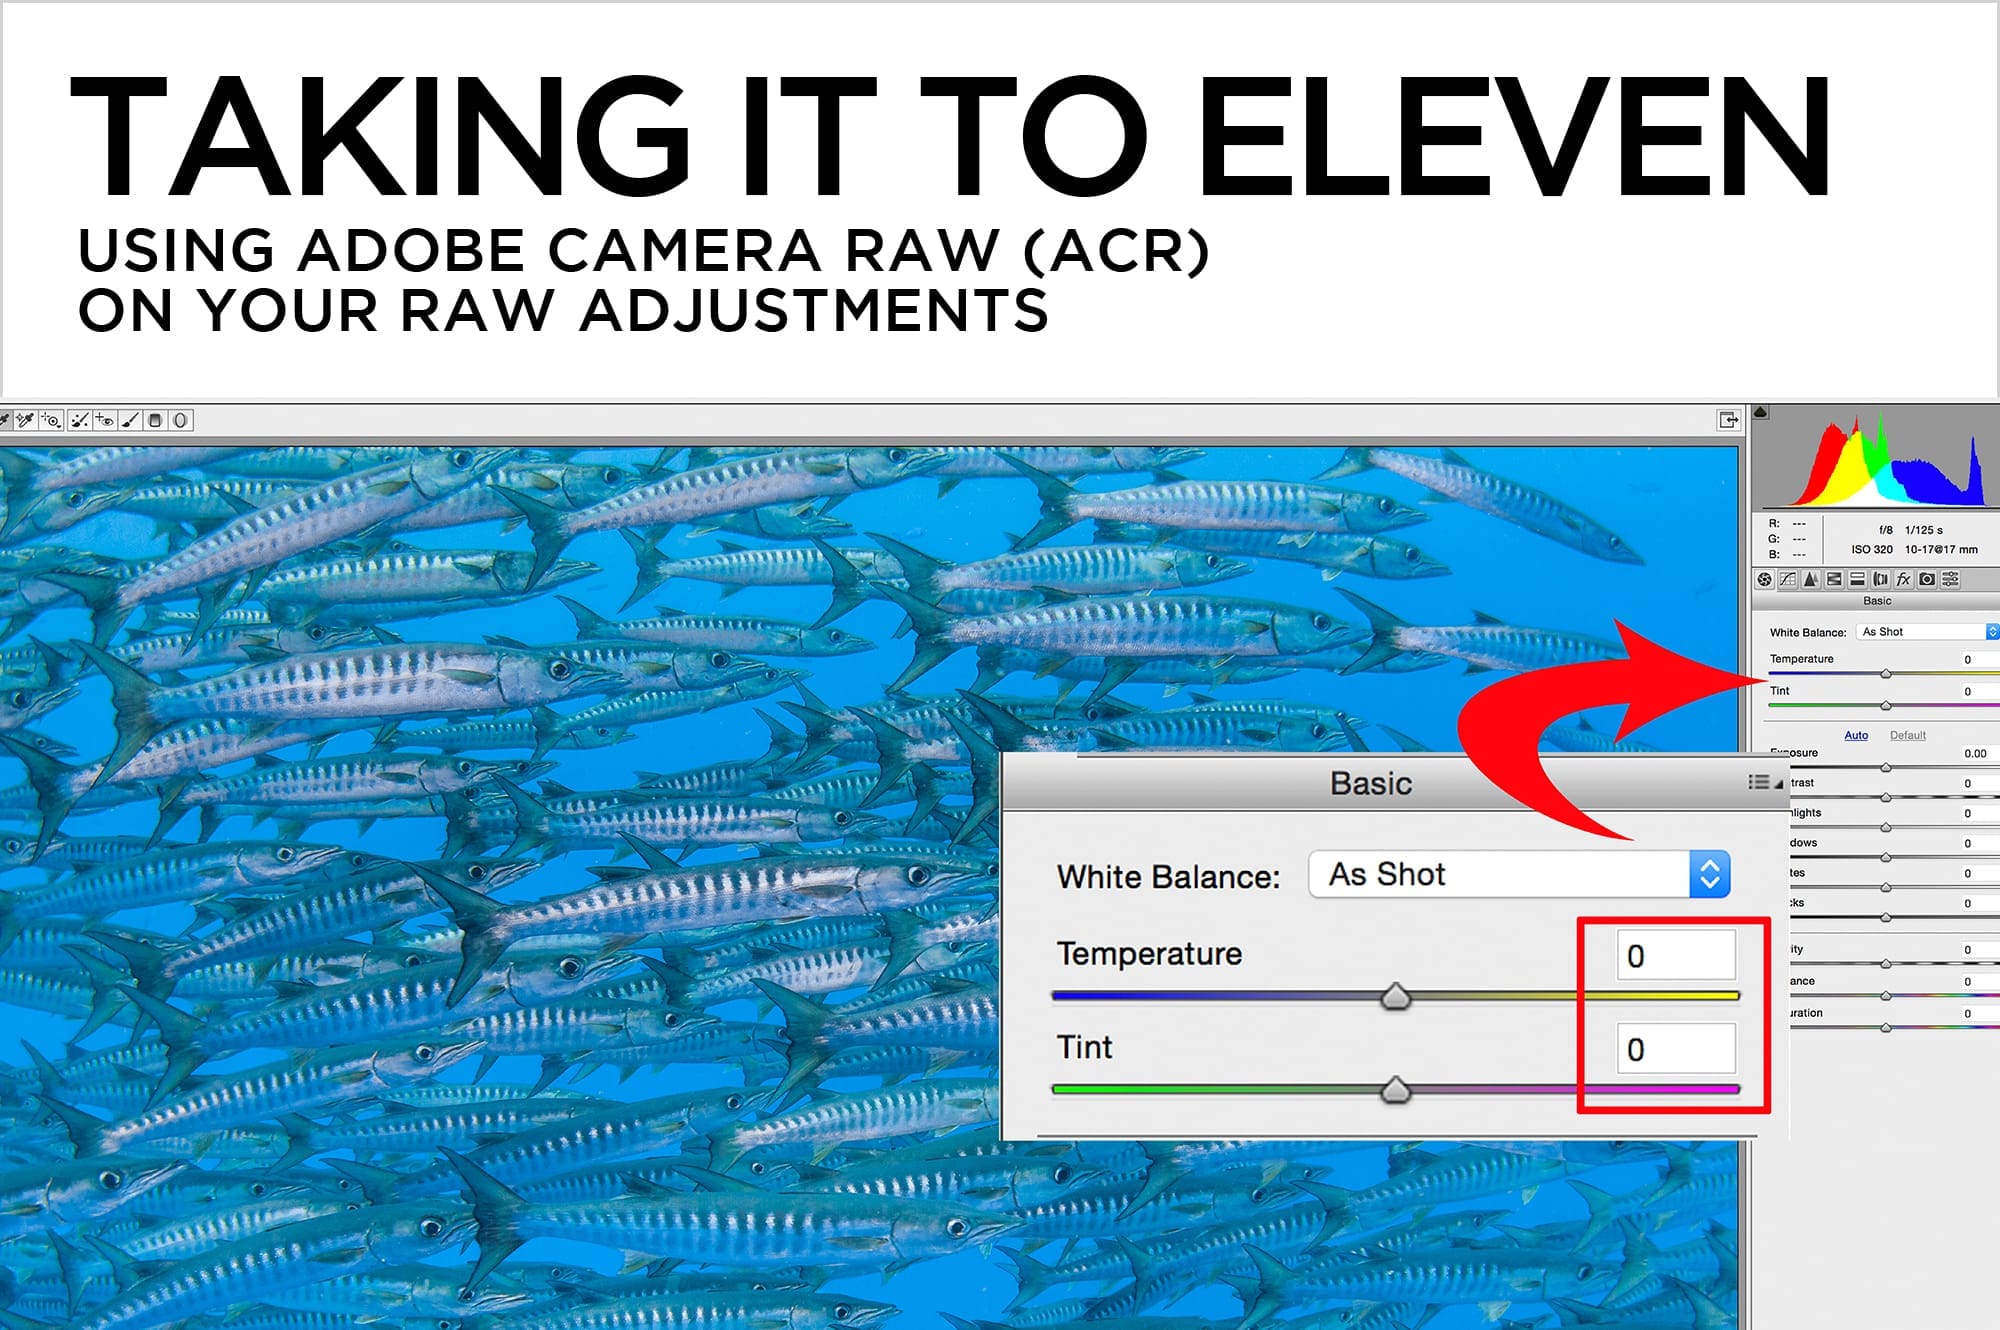
For example, this image of schooling barracuda is way too blue. After white balancing in Lightroom or ACR, I’ve maxed out both the Temp (blue/ yellow) and Tint (green/pink) sliders, yet I still don’t have the effect I want.

I’d like to be able to make the fish more neutral, without having to resort to any elaborate painting or masking. It would be fab if I could push the white balance sliders just a little bit beyond their limits – to eleven, if you will. By using a Smart Object workflow in Photoshop, I can do exactly that.
A Smart Object is a Photoshop layer that packages selected image data and embeds it into a special container. This so-called Smart Object container maintains non-destructive editing capacities for whatever’s embedded inside. Although any layer or combination of layers can be transformed into a Smart Object, only Smart Objects coming straight from Lightroom or ACR will maintain actual RAW image data. In this case I’ll create a Smart Object that embeds the RAW file of the barracuda, along with the Lightroom develop module adjustments that have already been made to the file.
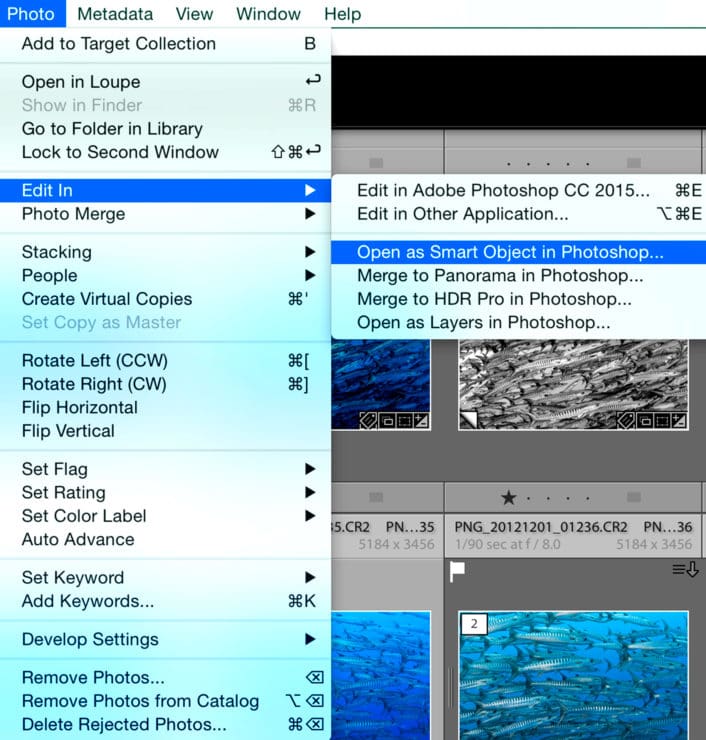
To open a Smart Object from Lightroom, go to Photo>Edit In>Open as Smart Object in Photoshop.
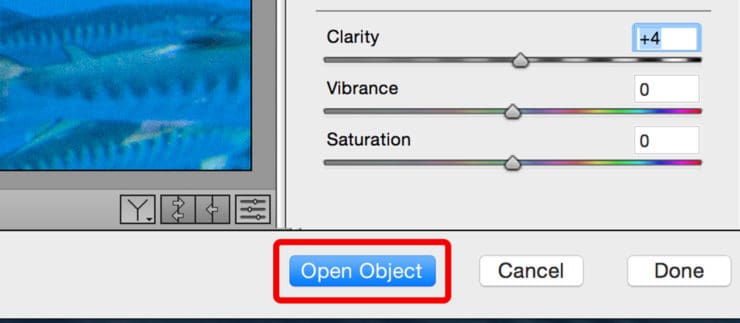
To open a Smart Object from ACR, hold down the Shift key, and click on the Open Object button at the bottom of the window.
A Smart Object can be identified by the small icon at the bottom right of its layer thumbnail. To re-edit the embedded RAW image from within the Smart Object, double-click on the Smart Object thumbnail, and ACR will open. Notice that the original Lightroom develop module adjustments or initial ACR settings are maintained. By using a Smart Object workflow, you can access and re-edit these settings directly from Photoshop’s layers panel.
![]()
To be able to re-edit RAW settings directly from a Photoshop layer is useful all by itself, but the object is to go beyond the limits of the original ACR sliders. In order to do that, a Camera Raw Smart Filter is called for. To add a Camera Raw Smart Filter, go to Filter>Camera Raw Filter. A new ACR window will open automatically.
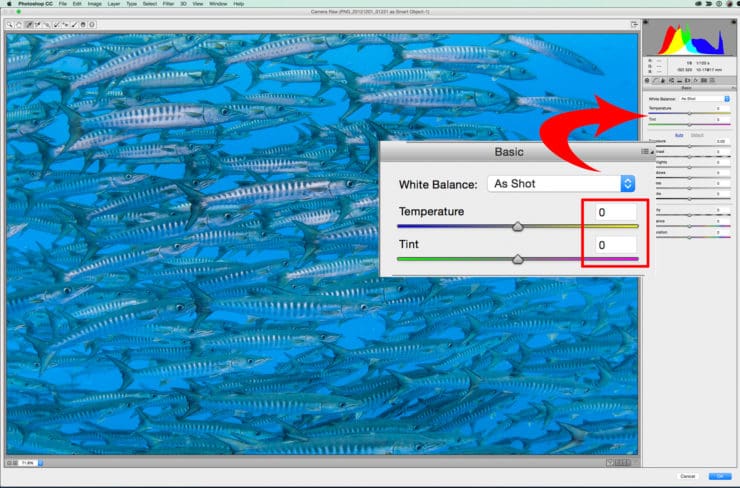
When I add a Camera Raw Smart Filter to the barracuda Smart Object, I get a clean new ACR window. Since the sliders in the new window start fresh at zero, I can add more of whatever settings are maxed out in the original ACR adjustments.
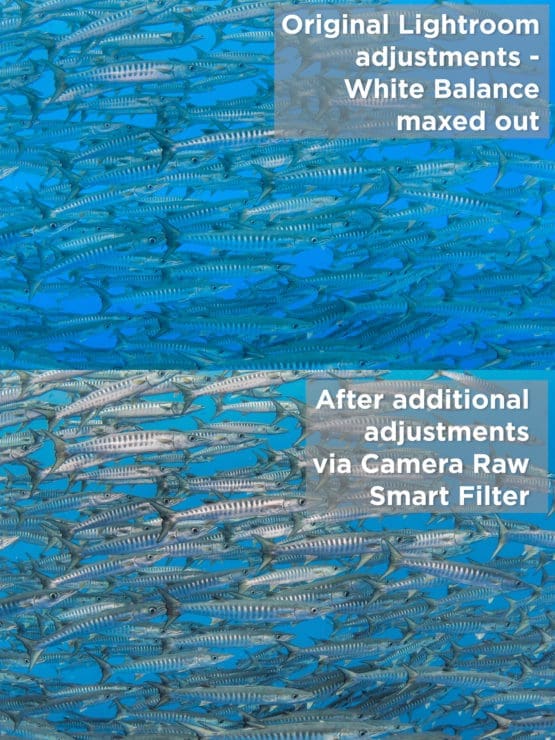
By sliding the zeroed out Temp slider to the right towards yellow, I get extra oomph from my white balance. The adjustment knocks back the remaining blue on the fish, and I’m much happier with the image. I could not have achieved this white balance with an ordinary Lightroom or ACR adjustment. At this point, I can jiggle more sliders, brushes, or filters on either the original Smart Object ACR settings, or on the Camera Raw Smart Filter to finish my editing.
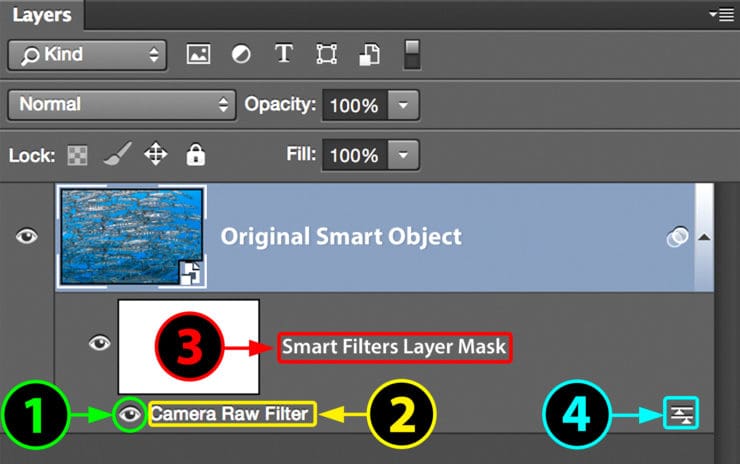
- To toggle a Smart Filter’s visibility, click the eyeball next to it on and off.
- To re-open a Smart Filter, double-click on its name in the layers panel.
- Smart Filters have their own layer mask. When the layer mask is active, painting on the image with black will conceal the effect of the Smart Filter in just the painted area. This makes every tool in ACR a potentially local tool.
- Smart Filters have a separate blending mode and opacity control that can be accessed by clicking on the small lines and arrows icon at the bottom right of the layer.
When you create a Smart Object in Photoshop via Lightroom, saving the Photoshop document puts the layered Smart Object file in the same folder as the original wherever it resides on your drive, and amends the file name to reflect its Smart Object status. The next time you look at the image in Lightroom, you’ll see the Smart Object version right next to the original in the grid.
When a Smart Object is created via Adobe Camera Raw, saving the Smart Object opens a Save As dialog box, which lets you rename the file and save it to the location you wish.
The language of Smart Objects and Smart Filters can be confusing at first, but it’s worth it to push past the mumbo-jumbo. Don’t be afraid to experiment – all the adjustments are completely non-destructive, and mastering this technique will pay off as an excellent addition to your post-production arsenal. One last note – if you really want to understand this technique at its deepest level, the 1986 masterpiece “This is Spinal Tap” is required viewing.