Compositing 101
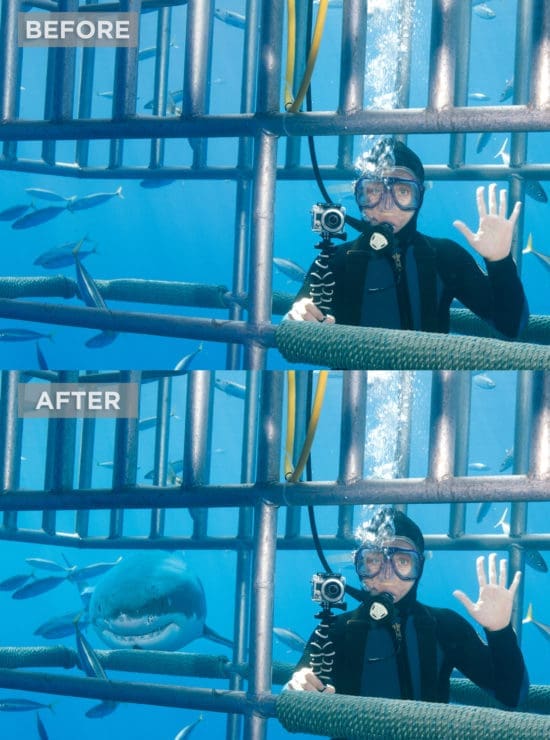
I know, I know – compositing is cheating. A composited image uses elements from one part of a picture in another part, or combines multiple photos to create a single image. The reality is that if you’re not breaking someone else’s rules, or intending to deceive for personal or financial gain, then compositing is a creative and completely legitimate editing technique, limited only by the Photoshop skills of the editor.
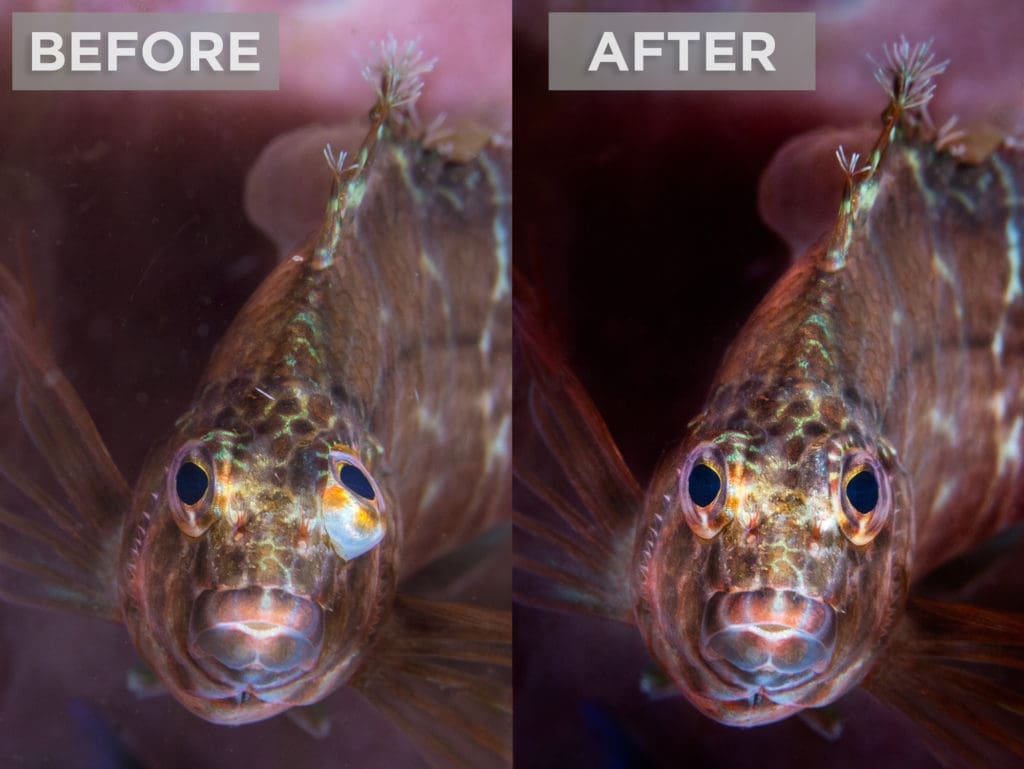
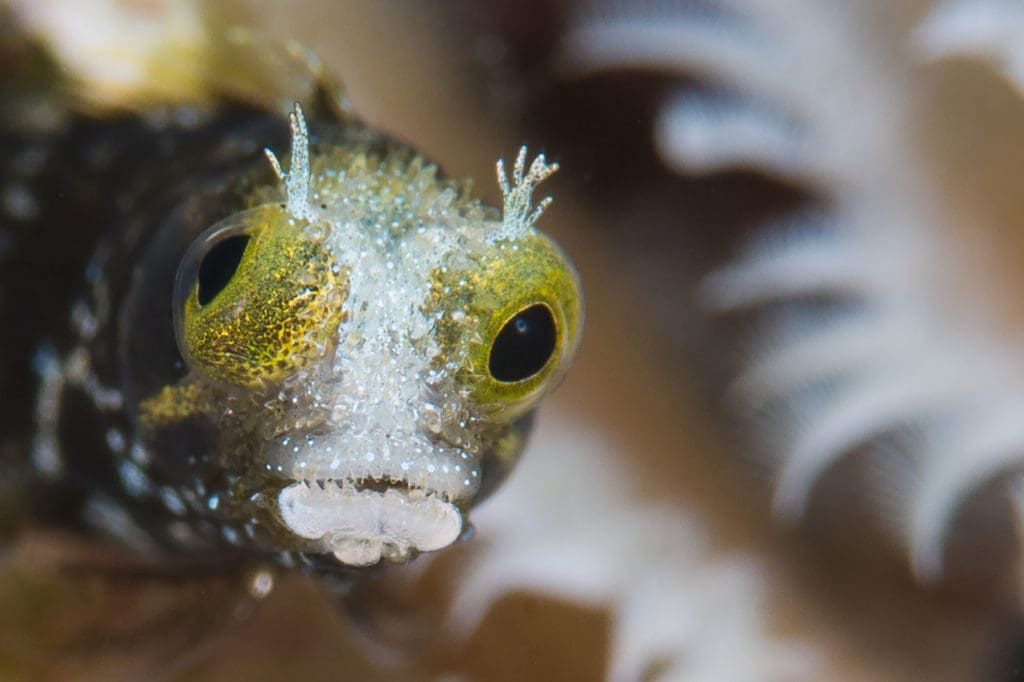
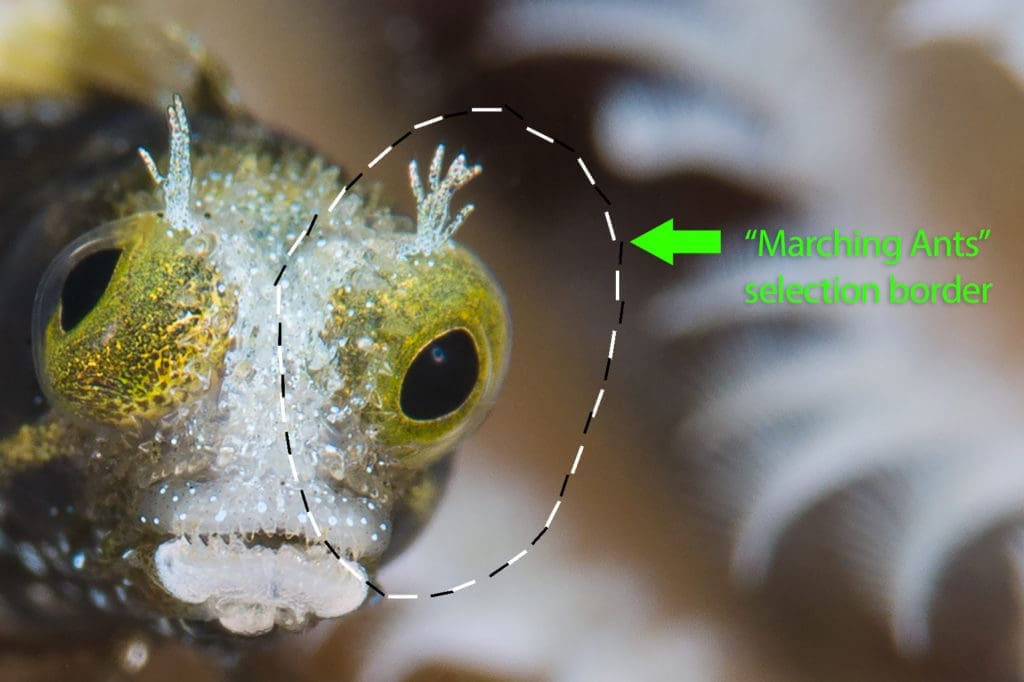
For example, I’d like this image better if the fish was looking at the camera with both eyes. Using a few intermediate Photoshop techniques, I’ll make a copy of the “good” eye of the critter and flip it to composite over the googly one.
- In Lightroom or Adobe Camera Raw, adjust tone, contrast, and color, and make any local changes required to complete your usual editing workflow.
- From Lightroom or Adobe Camera Raw, open the image into Photoshop.
- In Lightroom, go to Photo>Edit In>Edit in Adobe Photoshop CC 2015. The keyboard shortcut is Command-E (Mac) or Control-E (PC). From Adobe Camera Raw, hit the “Open Image” button.
- Make a generous selection of the area around the good eye, using any selection tool.
- Use the Lasso, Patch Tool, or Marquee Tool to draw a border of “marching ants” around the good eye. Don’t be too precise – grab a hunk of the surrounding area along with the eye.
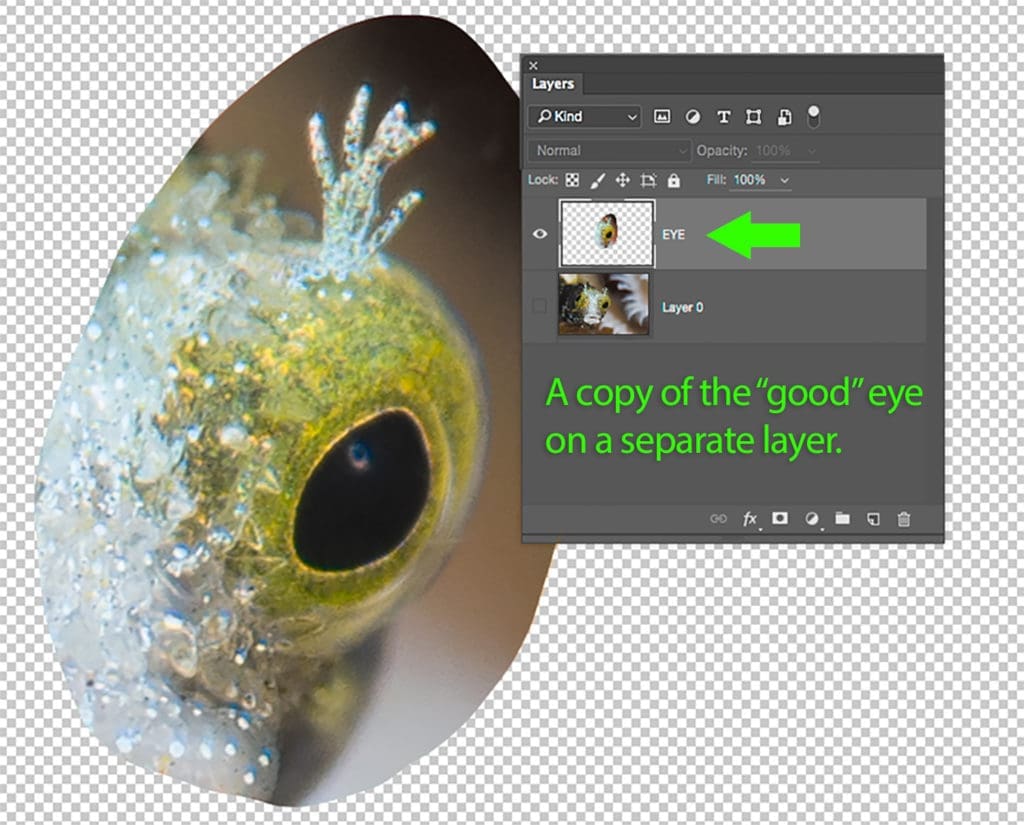
- Pop the active selection into its own layer so it can be moved and edited independently from the rest of the image.
- Go to Layer>New>Layer via Copy or use the keyboard shortcut Command–J (Mac) or Control–J (PC).
- Rename the layer.
- Double-click on the new layer’s current name to activate a text box, and type in “Eye”. Hit Enter or Return to commit the name.
- With the Eye layer selected, use the Transform tool to flip the good eye horizontally.
- Go to Edit>Transform>Flip Horizontal or use the keyboard shortcut Command-T (Mac) or Control-T (PC) to bring up the Transform bounding box, then Control (Mac) or Right-click (PC) within the Transform border and choose “Flip Horizontal” from the contextual menu.
![]()
- Lower the Eye layer’s opacity to see the original photo underneath, then move, rotate and resize it to align the new eye in roughly the right position.
- Move the Opacity slider in the upper right of the Layers panel to the left until you can see the original photo underneath. 50 or 60 percent usually does the trick.
- Click and drag within the Transform bounding box to move the Eye layer.
- Pull any of the handles on the bounding box to resize the Eye layer.
- The cursor turns into a curved, double-headed arrow when you place it outside of the bounding box near any corner. Click and drag to rotate the Eye layer.
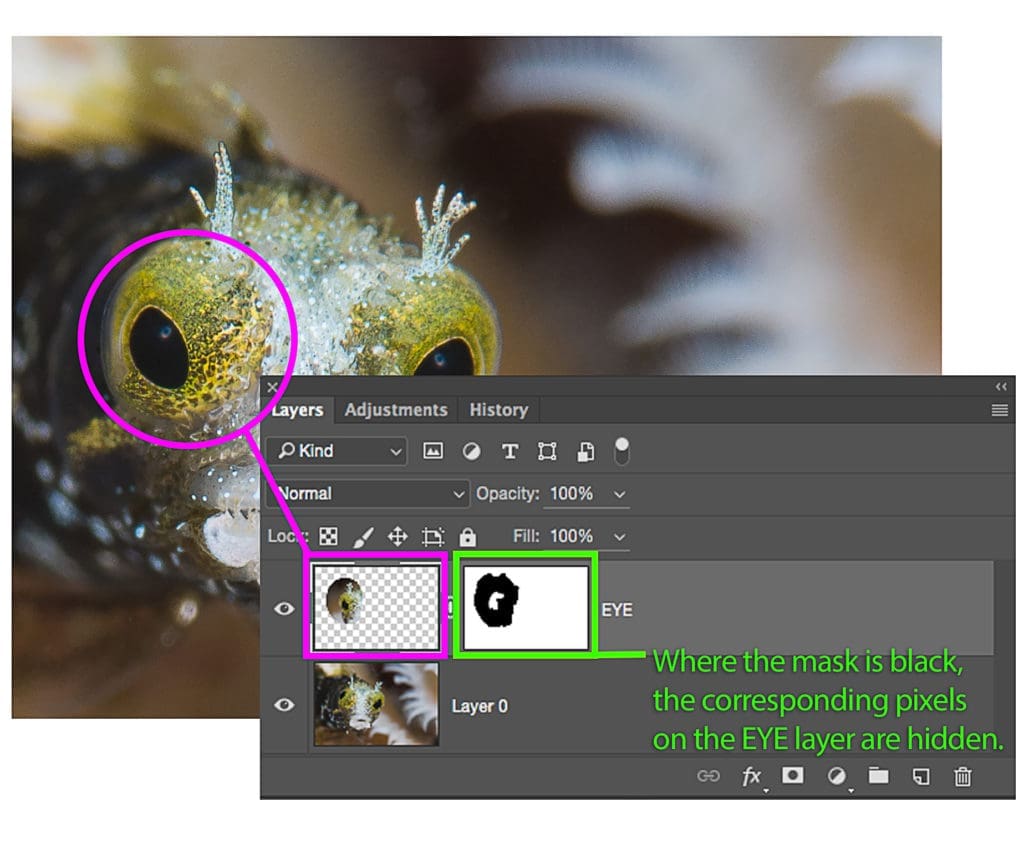
- Add a layer mask to the Eye layer and paint with black to hide residual pixels from around the composited eye.
- With the Eye layer selected, click on the New Mask icon at the bottom of the layers panel. It looks like a piece of paper with a hole punched in it.
- Get a brush from the Tool Bar. The keyboard shortcut is B. Check the Brush tool options bar at the top of the screen to make sure the brush is set to Normal blend mode, 100 percent opacity and 100 percent Flow.
- Make black the foreground color in the color picker. Paint with black over the areas you’d like to hide. Black on a layer mask blocks out corresponding pixels on the layer the mask is attached to, making them transparent so you can see the layer underneath. If you make a mistake, paint with white to restore the pixels.
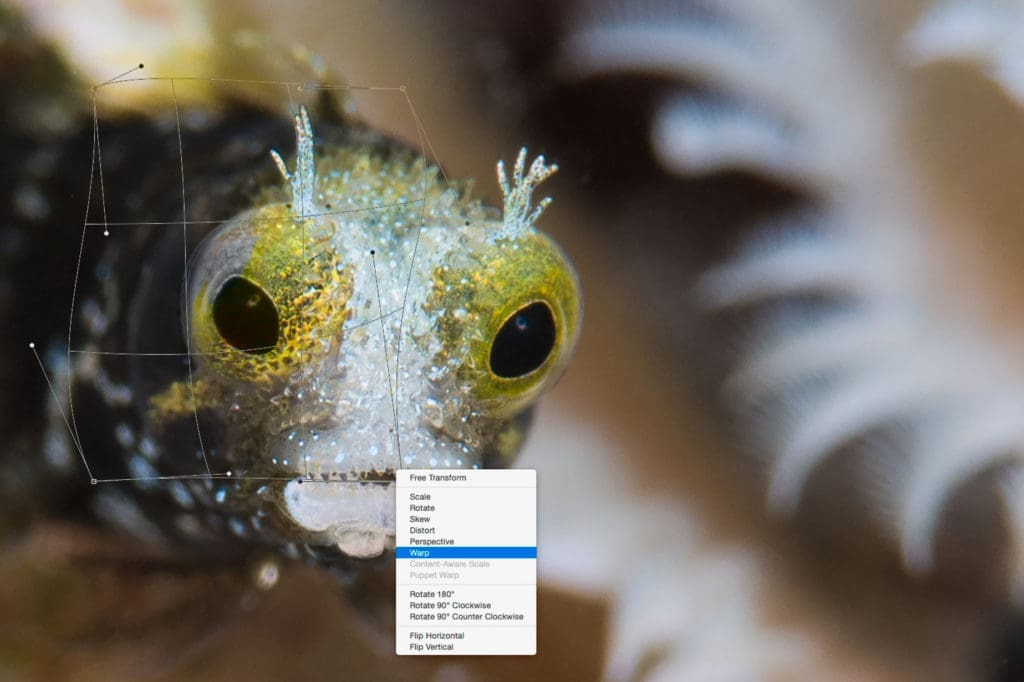
- Finesse the composite using the amazing Warp function from within the Transform tool, and clean up using Photoshop’s many healing, cloning and content aware tools.
- Go to Edit>Transform>Warp or Choose Warp from the Transform contextual menu.
- Use Warp to reshape the Eye layer, lining up the edges of the composite to fit. Click and drag anywhere on the inside of the grid, or pull the handles on the outside to stretch it into place.
- Analyze the image carefully, removing any repeated patterns or other telltale editing artifacts with whatever tools you have in your bag of tricks.
- Save your work.
- Go to File>Save, or hit Command-S (Mac) or Control-S (PC). In Lightroom, an edited psd or tif (depending on your Lightroom preference settings) version of the final image will show up in the Library right next to the original.
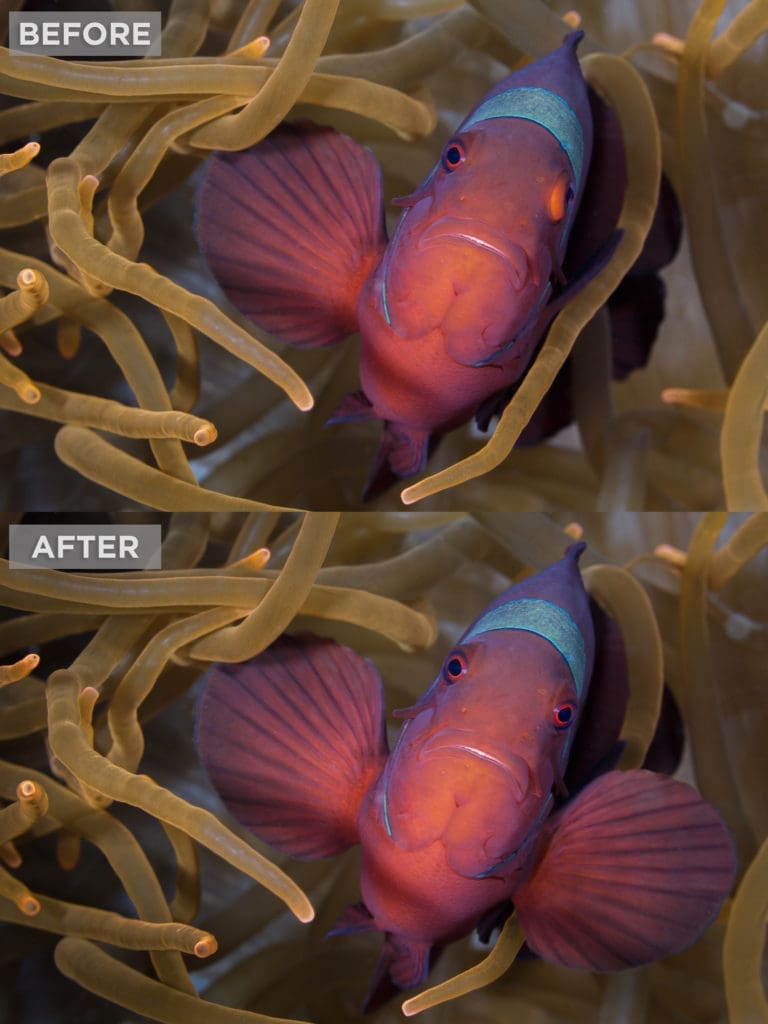
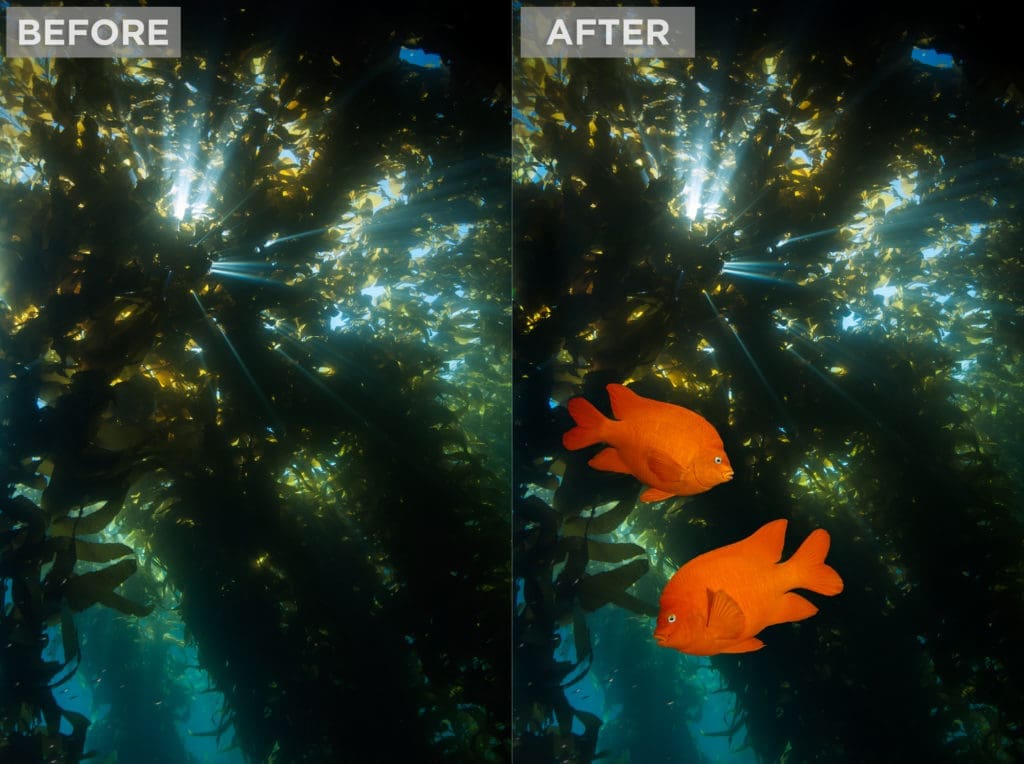
- Get Creative. This same technique can be used for lots more than flipping eyeballs!