Keep Sharks Looking Sharp in Post
Sharks are a favorite photographic subject of mine. Over the years, I’ve developed a few post-production techniques that help to mitigate common problems and emphasize desirable details in shark images.
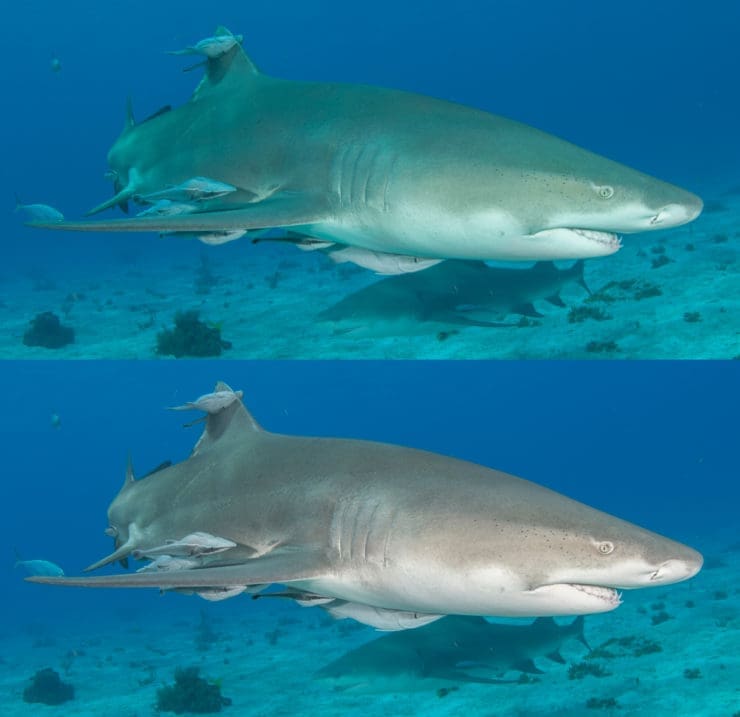
- Desaturate with an Adjustment Brush to remove unwanted cyan color on your shark.
In the Develop module of Lightroom, click on the Adjustment Brush icon. Slide the Saturation slider to the left to set a high negative value – you’ll finesse this later. You won’t see anything change until you paint with a brush in the image.
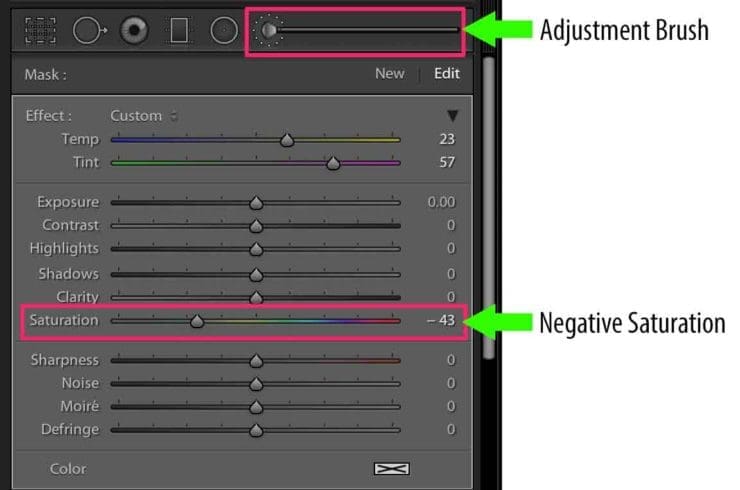
Brush over areas on the shark where you see a blue-green color cast. If you get sloppy with the brush, Holding down Opt (Mac) or Alt (PC) gives you a temporary eraser to tidy up.
Move the saturation slider back toward the right until you get the result you want.
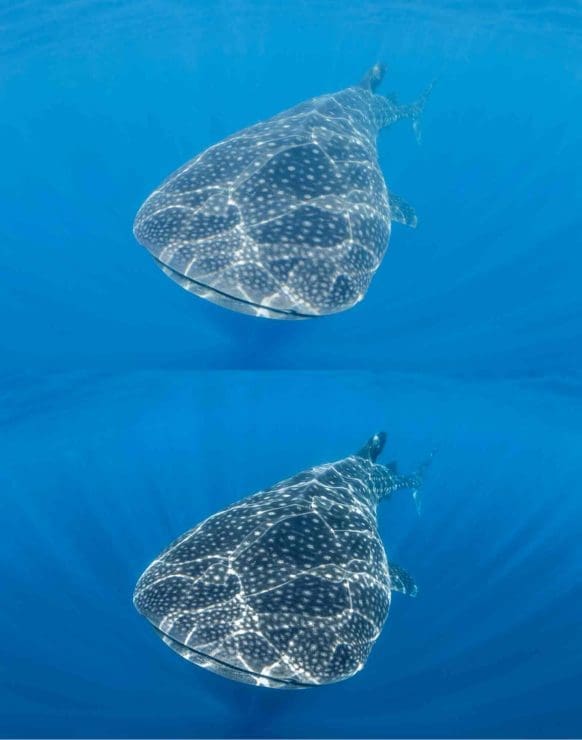
- Add Clarity with an Adjustment Brush to enhance pattern and emphasize eyes.
Clarity increases mid-tone contrast, giving the appearance of added sharpness and punch. Too much Clarity added globally in the Basic Panel can make your image look crunchy and over-processed. It’s better to add it locally using Lightroom’s Adjustment Brush and Filters.
In the Develop module of Lightroom, click on the Adjustment Brush icon. Set a high positive value for Clarity by moving the slider all the way to the right. It doesn’t matter if you set it too high – you’ll dial it back later. You won’t see a change until you paint with the brush in the image.
Brush over areas that have pattern or texture that you want to emphasize. Locally added Clarity can also work to punch up contrast in light rays. Adjust the slider back down to the level that looks best. You can also add Clarity with the Graduated or Radial Filters.
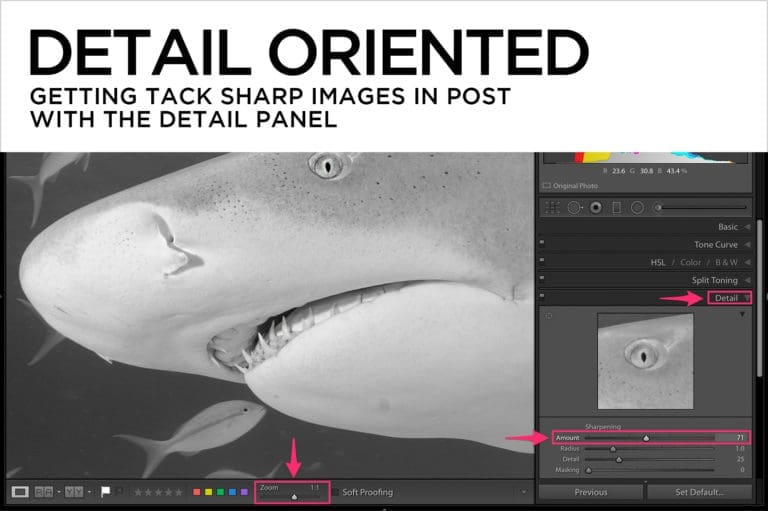
- Sharpen teeth, not water.
Sharpening is the process of emphasizing edges. When sharpening gets applied to water, or other areas of flat color, it can do more harm than good. Luckily, Lightroom’s sharpening controls include a tool that lets us apply sharpening to only areas of critical contrast.
In the Develop module of Lightroom, open the Detail Panel.
After setting the desired values for Amount, Radius, and Detail, zoom out so that you can see your whole photo.
While holding down Opt (Mac) or Alt (PC), click and drag on the Masking slider. At first you’ll see a completely white screen. As you move the slider to the right, some areas become gray and eventually some areas will be black. Where you see white pixels, 100% of the sharpening values set in Amount, Radius and Detail are being applied. Gray pixels indicate some lesser value of sharpening, and black means that there’s no sharpening at all.
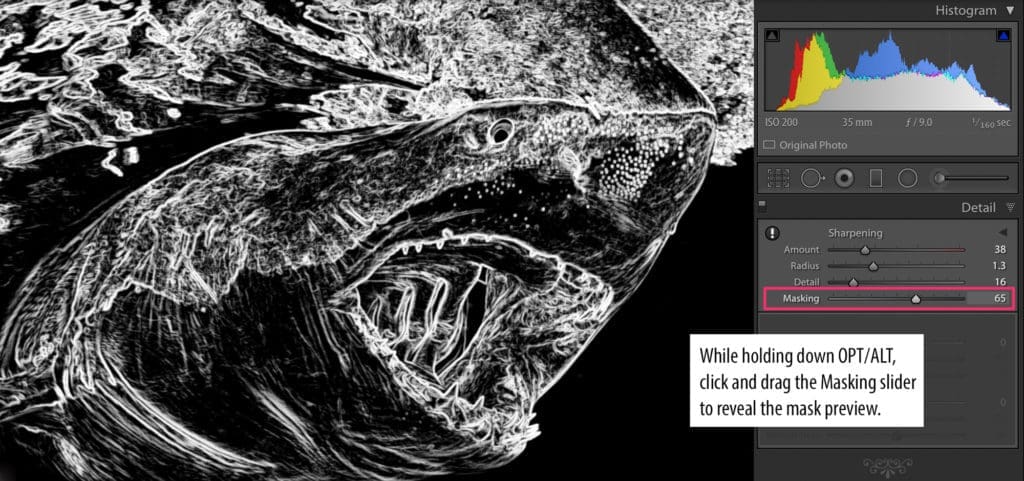
Stop when you can see all critical detail in white, and flat areas like water in black.
- Remove bubbles and bait using Content Aware Fill in Photoshop.
Open your image in Photoshop. With the lasso tool, draw a loose selection around the object you want to remove. Go to Edit>Fill, and choose Content Aware from the dropdown menu. If you have a Color Adaptation checkbox (Photoshop CC), click it on. Hit OK and watch the magic.
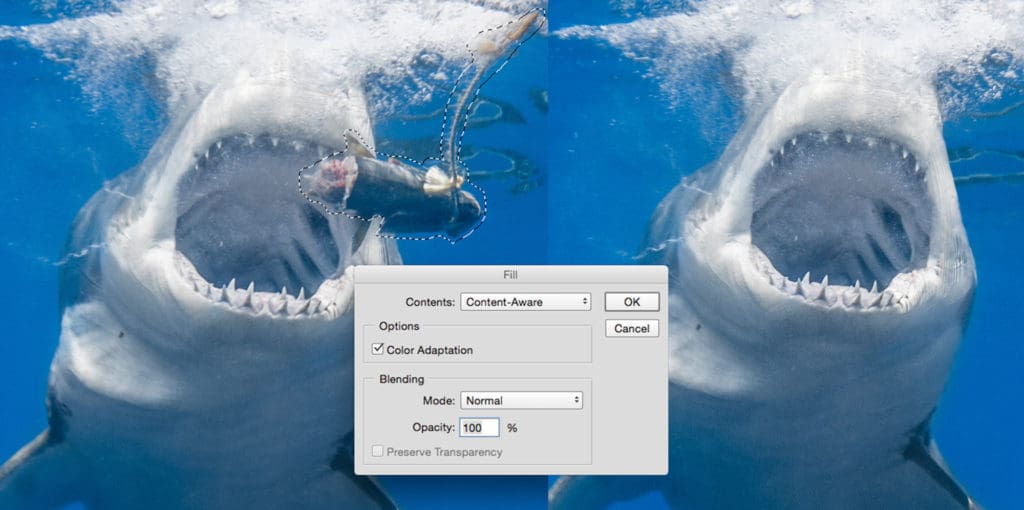
Content Aware doesn’t always do a perfect job, but it usually gets you most of the way there. Use Photoshop’s healing and cloning tools to clean up any details.
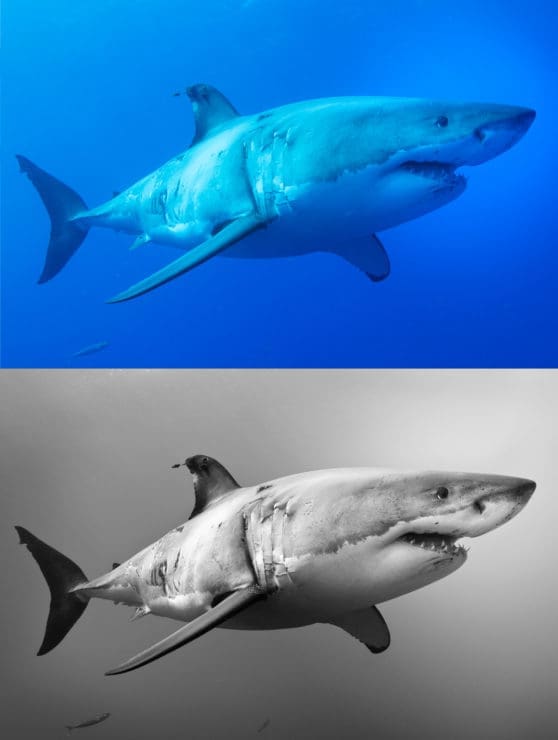
- Sharks are fantastic candidates for Black & White conversion. The Targeted Adjustment Tool in Lightroom makes the process intuitive and easy.
In the Develop module of Lightroom, select an image and click on the B&W tab near the HSL panel. The B&W mix panel will open, and you’ll see Lightroom’s default B&W conversion of your image. Even though your picture is now B&W, the sliders in the panel correspond to color channels, which makes the editing process nothing better than a guess if you don’t remember which part of your now B&W photo used to be a particular color.
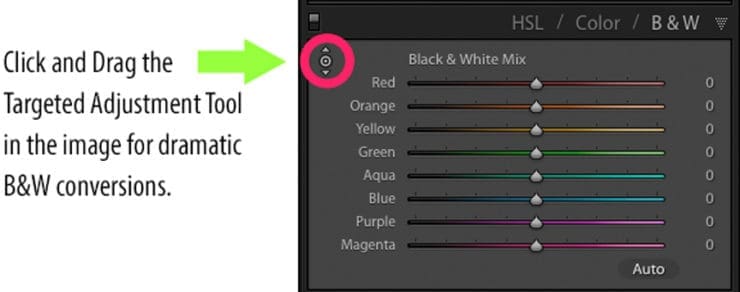
In the upper left corner of the B&W mix panel is the Targeted Adjustment Tool. Click on its icon to activate it, and move your cursor into the image. Click and drag up in an area you wish to be brighter, and down where you want it darker. It’s just that simple. The Targeted Adjustment Tool also exists for the Tone Curve, another panel useful for creating dramatic monochromes.