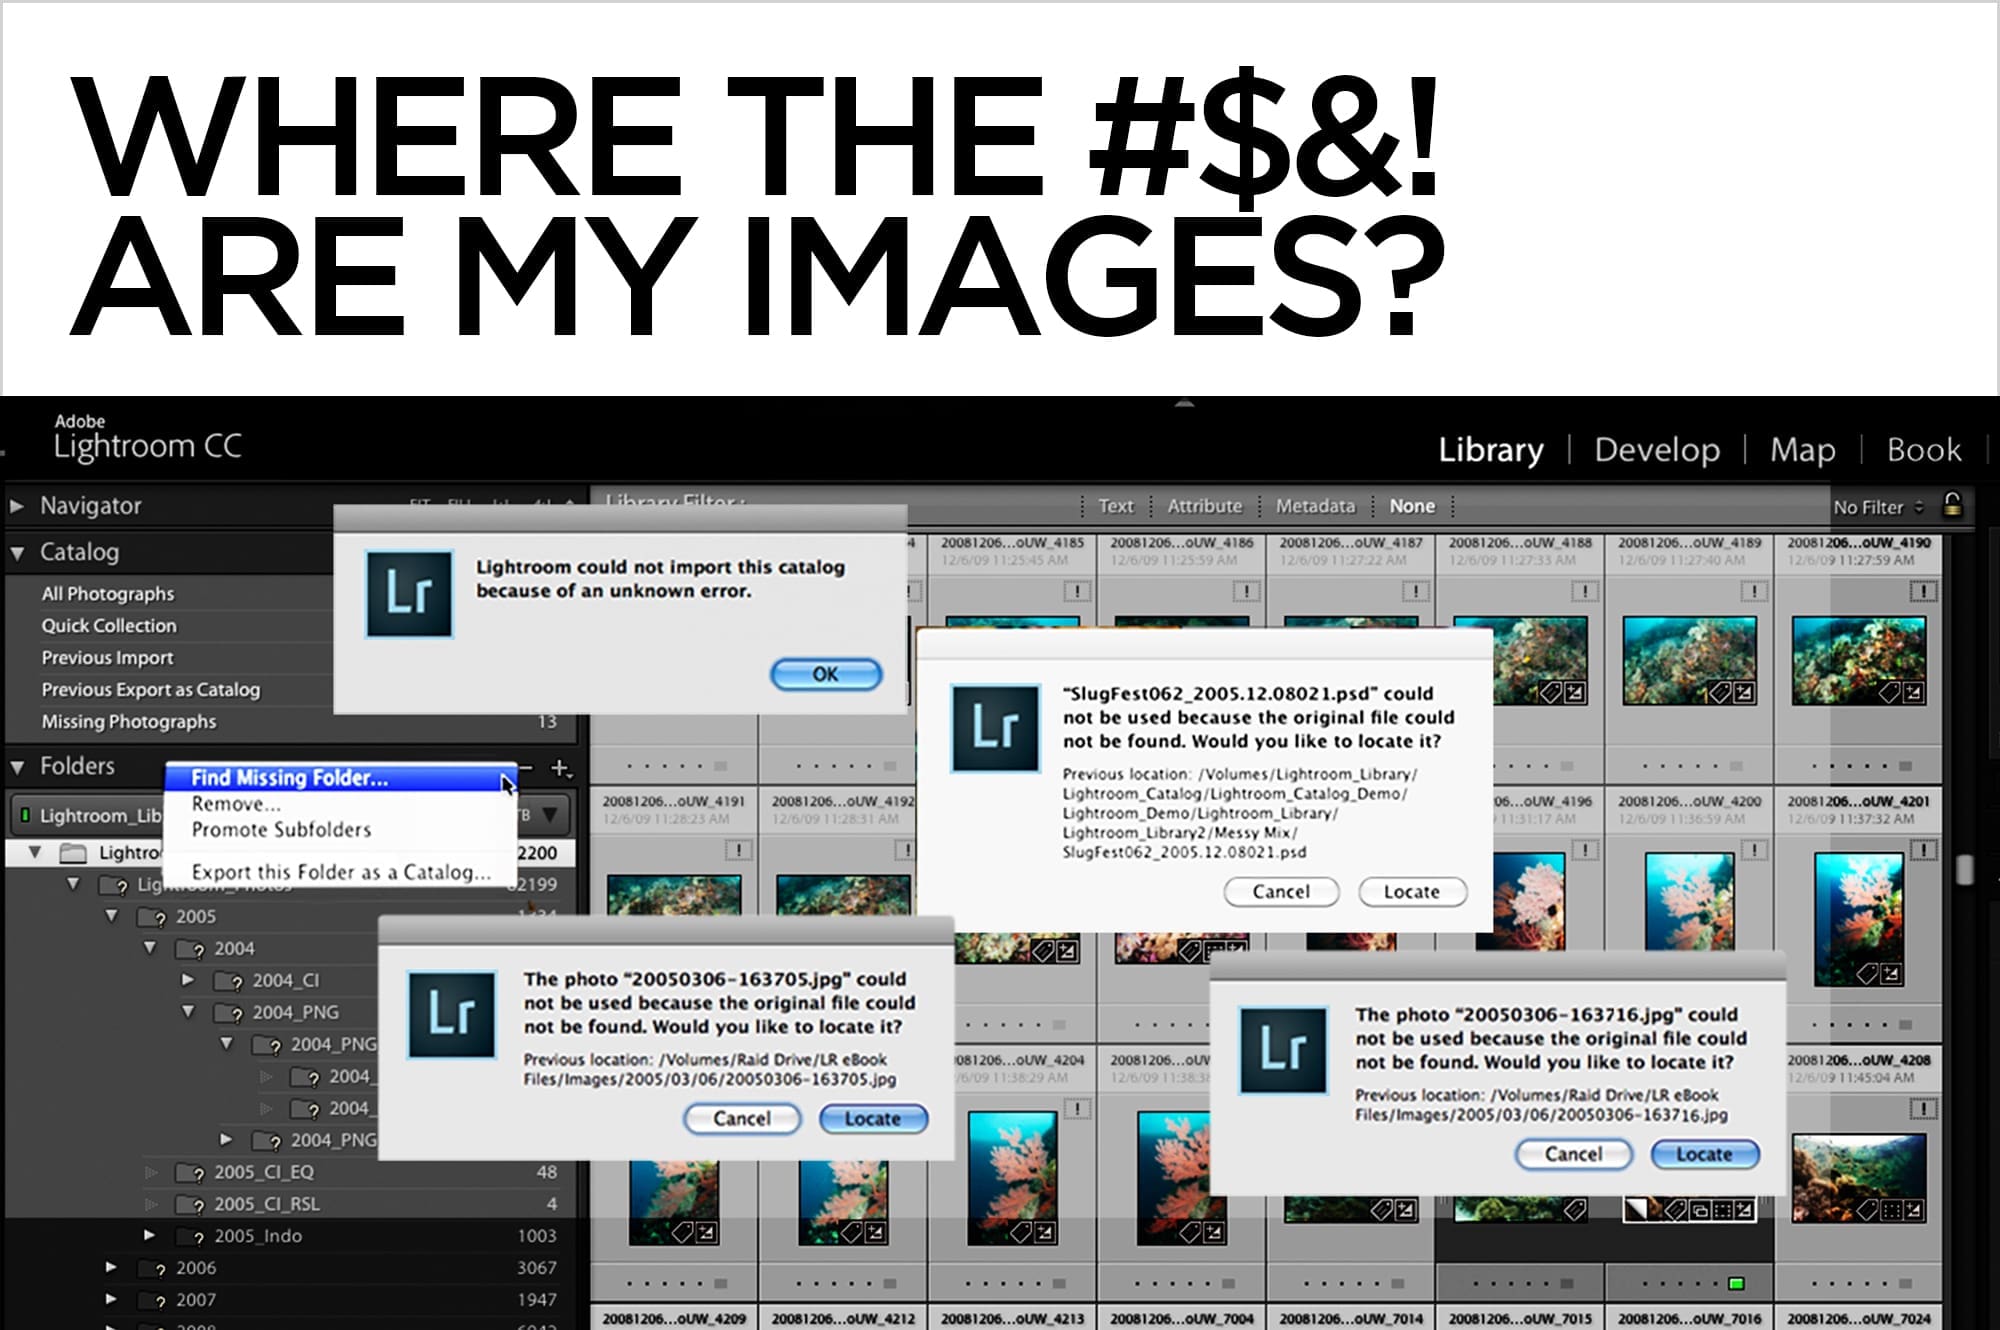
Where the #$&! Are My Images?
Digital Asset Management 101 for Lightroom

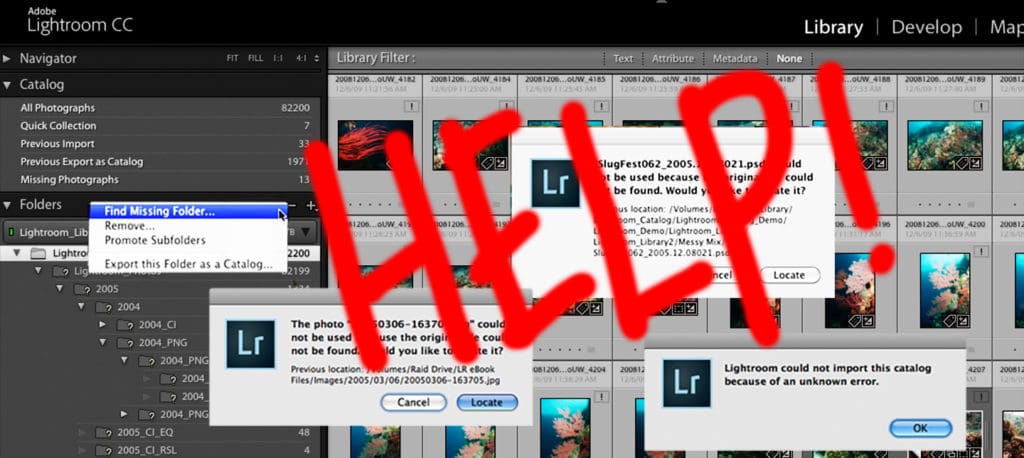
The single most common question I’m asked about Lightroom is “Where the #$&! are my images?”. Understanding how Lightroom manages and displays information can help you stay organized and out of DAM (Digital Asset Management) trouble.
The Lightroom Catalog
The Lightroom Catalog is an immensely powerful database that references imported images from wherever they’re stored on your drive. It’s a single file that points Lightroom to your original photos, but it doesn’t contain the actual photo files. You can identify a Lightroom Catalog by its file suffix of .lrcat.

The Lightroom Catalog, not unlike a card catalog in a brick-and-mortar library, holds all the information about each asset in the Lightroom Library. The location, file name, keywords, star ratings, color corrections and every single speck of backscatter removal are all stored in the Lightroom Catalog. The first time you start Lightroom, a new, empty catalog is automatically created in the following folders:
- Mac OS /Users/[user name]/Pictures/Lightroom
- Windows \Users\[user name]\Pictures\Lightroom
The Import Process
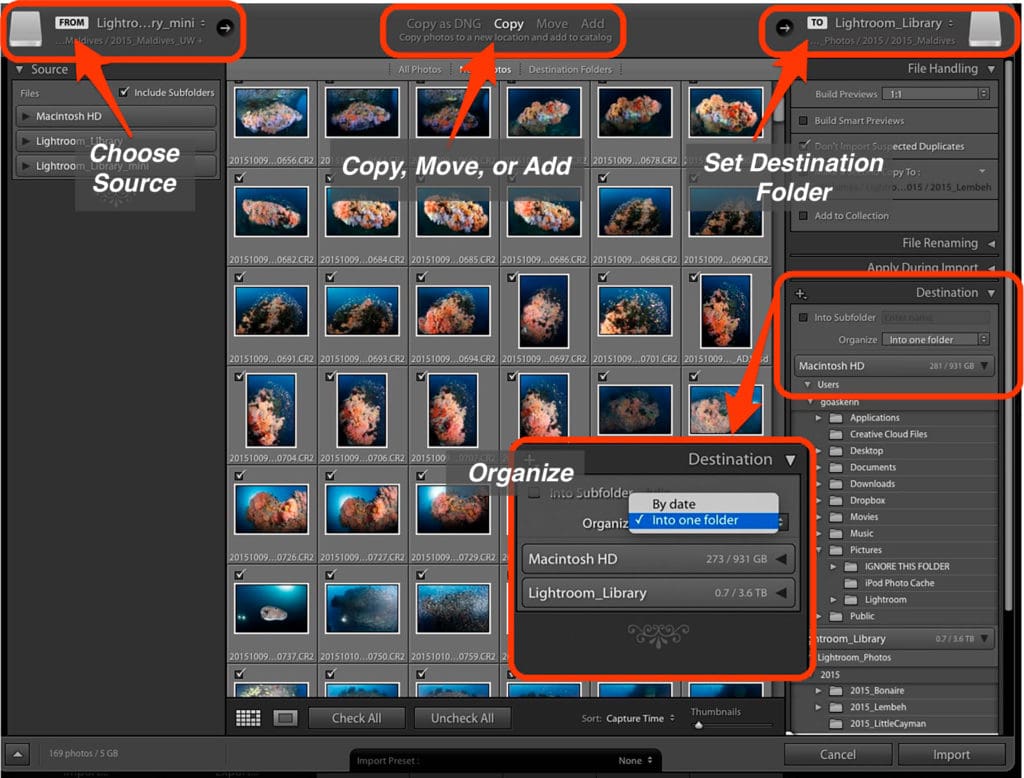
Lightroom adds images to the catalog via the Import process, but the original, physical image files are not “in” Lightroom. A better word for “import” might be “reference” or “link”. During Import, you point Lightroom to the source files, specify whether you want to copy, add or move them, and most importantly, set a destination folder for the photos. Lightroom then references the original photos, and builds previews to serve as a visual link between them and the Lightroom catalog. Changes made to the images are displayed via their previews, but the originals are never touched. Lightroom Previews are stored in a separate file that ends in .lrdata, usually in the same location as the .lrcat file.

Along with setting a destination folder, you must also tell Lightroom how you want your photos organized. When copying, the choices are “Into One Folder” or “By Date”. Pay close attention when choosing Destination and Organize options in the Import Module or you’ll wind up copying your images to parts unknown, in a crazy nest of hard to navigate subfolders.
Relocating Imported Files and Folders
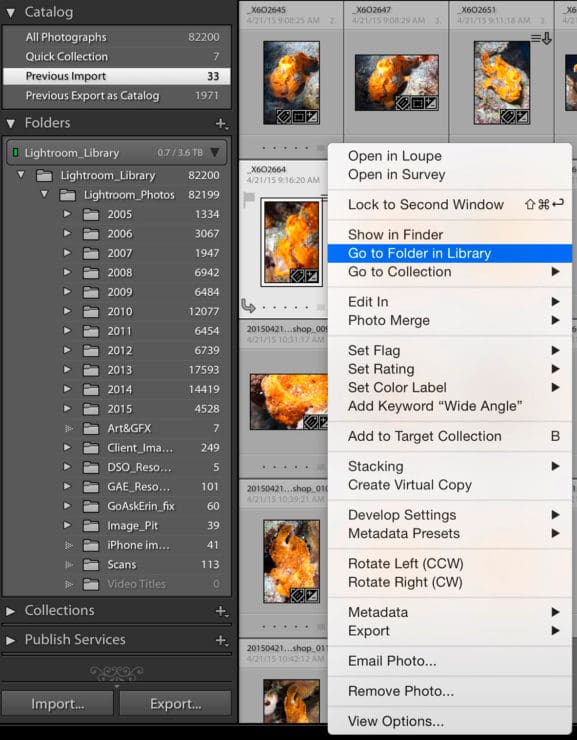
Should the unspeakable occur, and your imported photos go who-knows-where, don’t panic. In the Grid View of Lightroom’s Library Module, it’s easy to track them down. Select “Previous Import” from the Catalog Panel, and click on an image. Control-click (Mac), or Right-click (PC) to reveal a contextual menu. Select “Go to Folder in Library” to see its location in the Folders panel. The original photo lives in that exact folder location on your drive. To move photos from one location to another, click on the center of the image preview and drag it to the desired destination in the Folders panel. You can also move entire folders (subfolders included) by dragging them to a new location. In both cases, when Lightroom asks if you want to move the files on disk. Choose “Move”.
Finding Missing Files and Folders
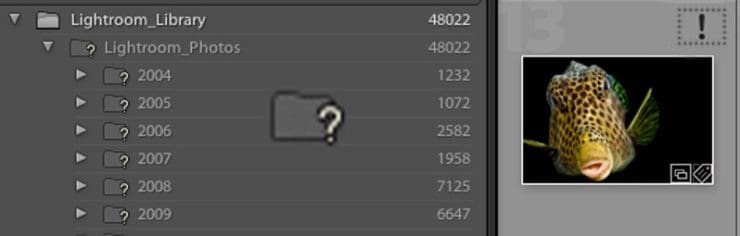
Once your images are imported, it’s important to use Lightroom to move or rename them. Making changes from Finder or Explorer will break the database link between Lightroom and your originals, resulting in a question mark on a missing folder, and an exclamation point on a missing image. Remember that “missing” doesn’t necessarily mean lost – it just means there’s a broken link.
To find a missing folder, select it and Control-click(Mac) or Right-click(PC). Choose “Find Missing Folder” in the contextual menu and navigate to it in the ensuing browser.
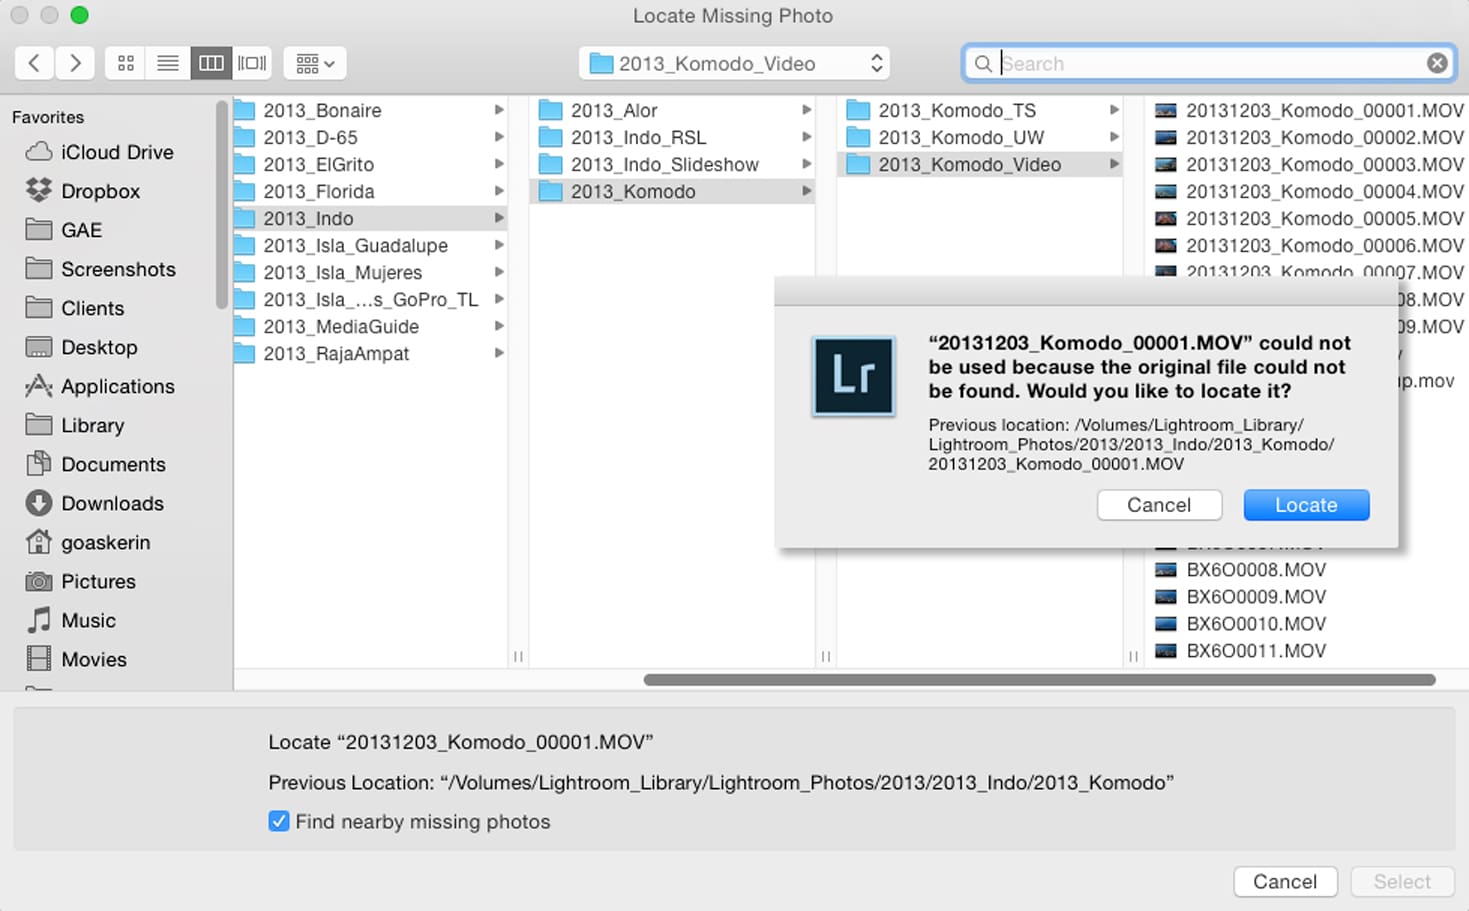
To find a missing image, click directly on the exclamation point in the upper right corner of its preview. In the ensuing dialog, which shows you the image’s last known location, click “Locate”. Navigate to the image in the next browser window. Tick on the “find nearby missing photos” checkbox to round up other strays in the same folder.
If you really don’t know where the missing asset is, type its name in the Search field to scan your system for it.
Pro Tips:
- Keep ALL of your photos in a single parent folder with uniquely named subfolders. It’s best to keep your Photo library and Lightroom Catalog on a dedicated or external drive. You can download a diagram of my recommended folder structure here:
- Operate from a single Master Lightroom Catalog. Multiple catalogs are a huge source of DAM distress. They don’t synchronize automatically, they don’t share information, and only one can be open at a time.
- Don’t agree to “Use Default Catalog” if Lightroom can’t find the one you want. Click on “Choose a Different Catalog”, and navigate to the desired .lrcat file. If your catalog is on a drive that’s disconnected, then choose “Quit”, connect the drive and start over. Agreeing to “Use Default Catalog” will open a new, empty catalog, and you’ll be back to asking “Where the #$%! Are my images?”.