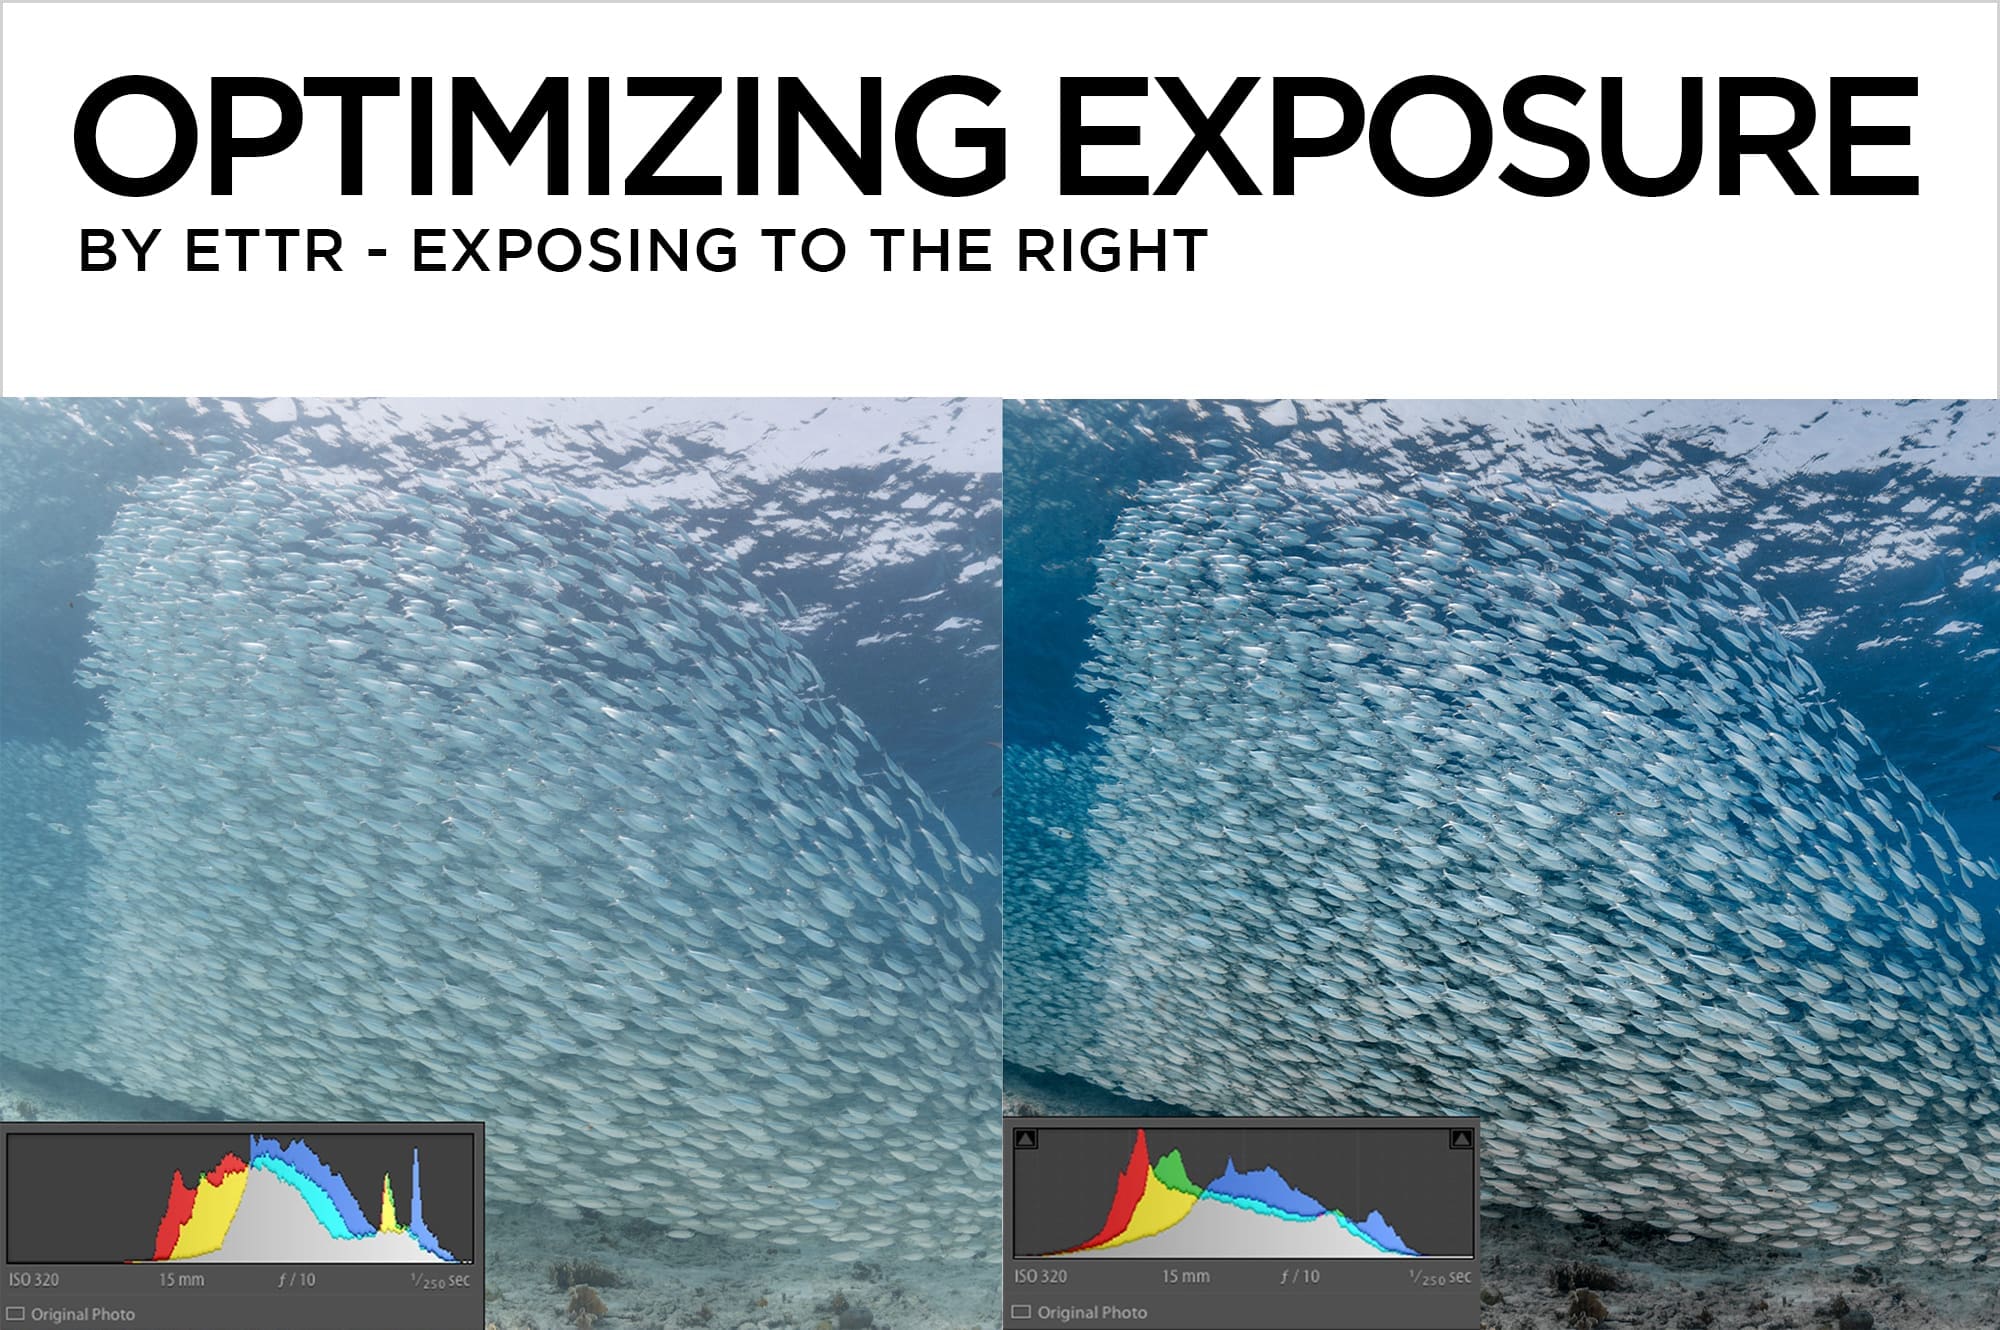
Optimizing Exposure by ETTR – Exposing to the Right
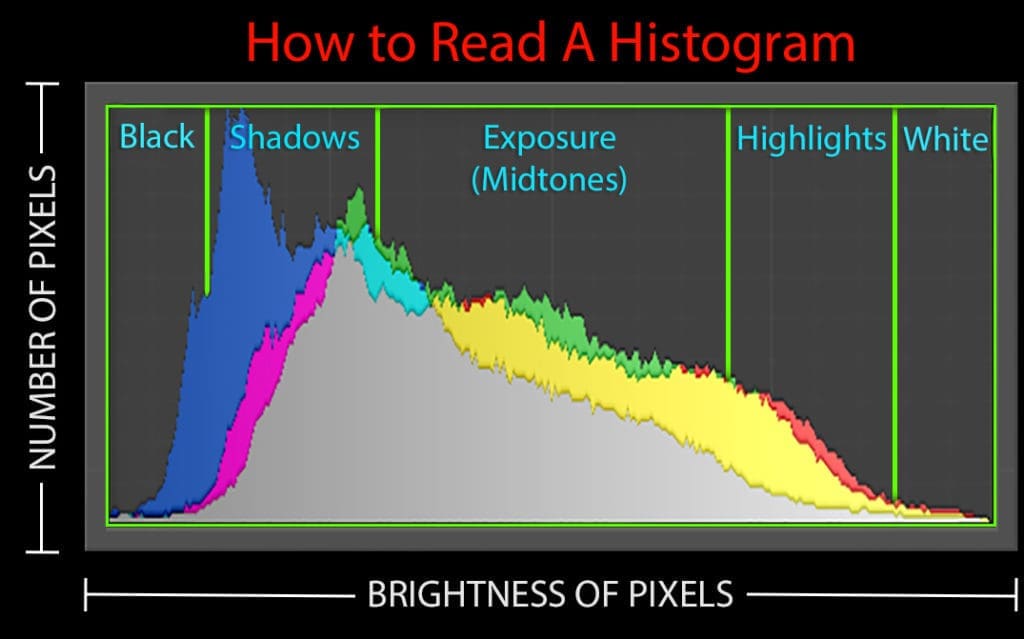
If you’re not already shooting with the help of your camera’s histogram, it’s time to start. A histogram is a graph that shows the distribution of tonal values from black to white in your image, and it’s a very accurate indicator of overall exposure. By not checking out the histogram as you shoot, your exposures are a guess at best.
All data is not collected equally
ETTR (exposing to the right) is a RAW image capture technique that increases the exposure of an image in order to maximize the amount of data collected by the camera’s sensor.
Because digital image sensors collect 50 percent of all available data in the single brightest stop, underexposing your photo by even a small amount is tantamount to tossing a significant amount of information out the window. An underexposed shot often looks just dandy on the back of the camera, but in fact the LCD preview is a terrible predictor of exposure. Use the histogram to analyze what kind of exposure you’re capturing with each shot.

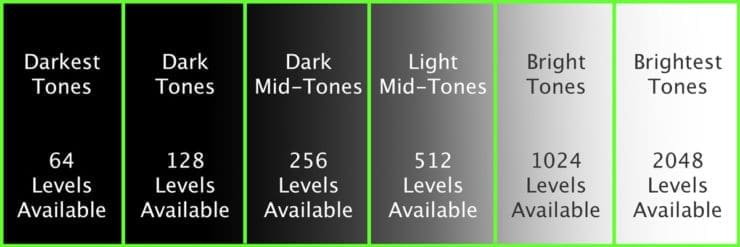
For the sake of this example, let’s say that a camera has 5 stops of dynamic range (from darkest to brightest) and shoots a 12-bit RAW image, which is capable of recording a total of 4,096 tonal values. You’d think that each of the 5 stops should be able to record 850 tones – a fifth of the total, but that’s not how it works. In reality, the brightest stop (farthest to the right on the histogram) collects a weighty 2048 values, with each subsequent stop to the left (darker) recording half the amount as the previous one. In short, the right side of the histogram holds the data and the left side holds the noise.
When to use ETTR
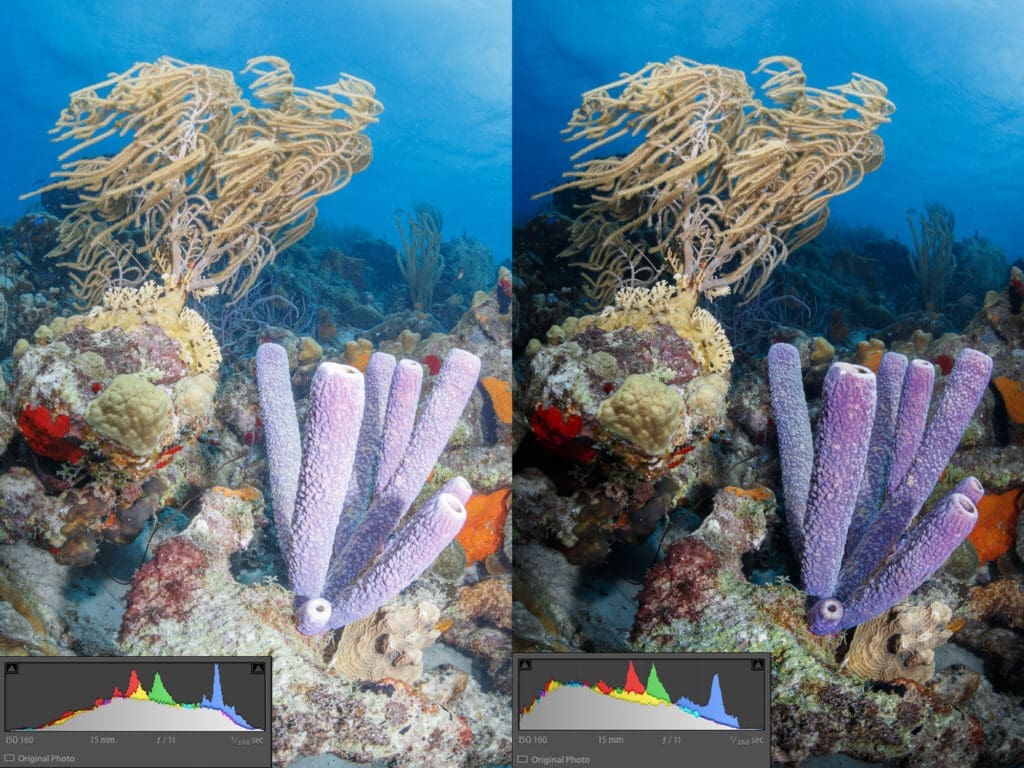
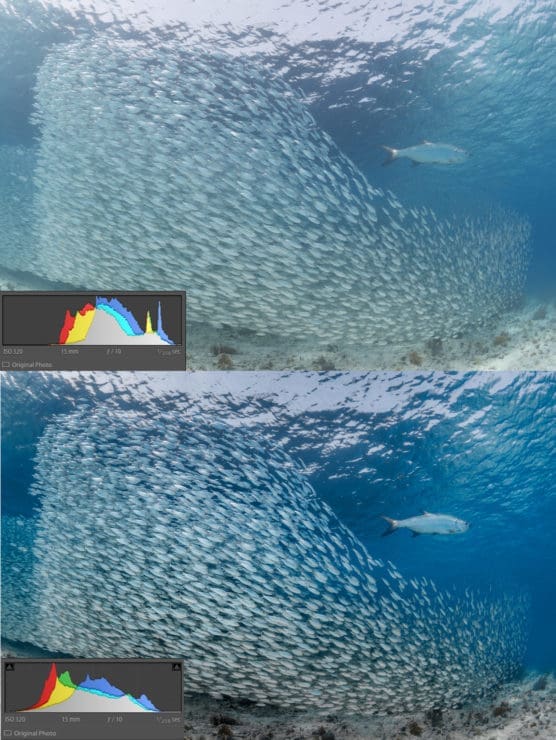
This technique isn’t something you’ll necessarily use on every shot. It’s not easy to use ETTR technique when the dynamic range of the camera is already pushed to its limits, for instance when shooting sunballs or other ultra high-contrast scenes. ETTR pays off most in moderate and low contrast shooting scenarios, where the ultimate goal is to bias your exposure brighter, with the histogram snugged up to the right, but not so far to the right that the highlights get “clipped” by running into the right edge.
Don’t overdo it!
Pay close attention to the camera’s highlight warning “blinkies”. When you see them start to flash, it’s time to back off. They’re a friendly reminder that you may be in danger of blowing out highlights. Specular highlights, which are reflections of light from shiny surfaces like water, fish scales and critter eyeballs, might not contain enough critical detail to worry about in small amounts, but completely obliterated highlights are not recoverable and spell doom for your picture. A little clipping is OK, a lot is bad.

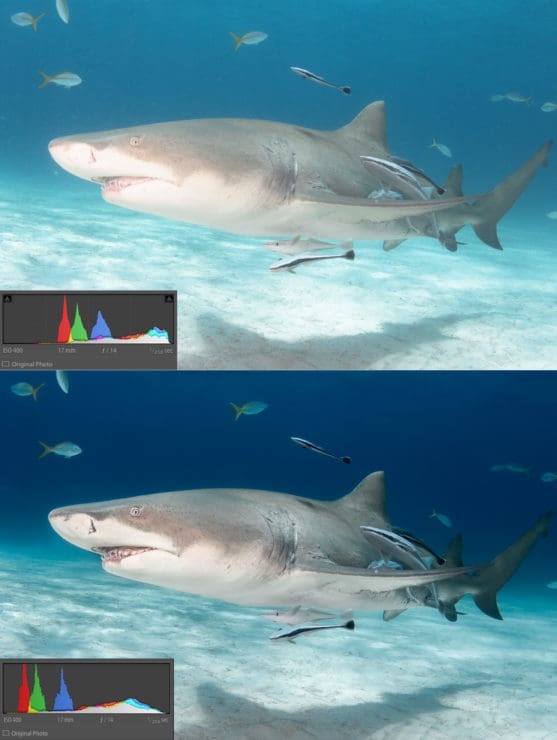
Basic Post Workflow for ETTR RAW captures
All ETTR images need work in post. Right out of the camera, ETTR captures often appear washed out or overexposed. All those yummy tones in the brightest part of the image need to be mashed back toward the left of the histogram in order to restore richness, saturation and contrast to the shot.
Remember, the Highlights and Shadows sliders are detail sliders, meant to restore detail in bright or dark areas without affecting clipping.
The Whites and Blacks sliders establish the actual white and black points in your photo.
- In the Basic Panel, slide the Highlights slider all the way left.
- Slide Exposure towards the left to lower the overall brightness level.
- Add Contrast if necessary.
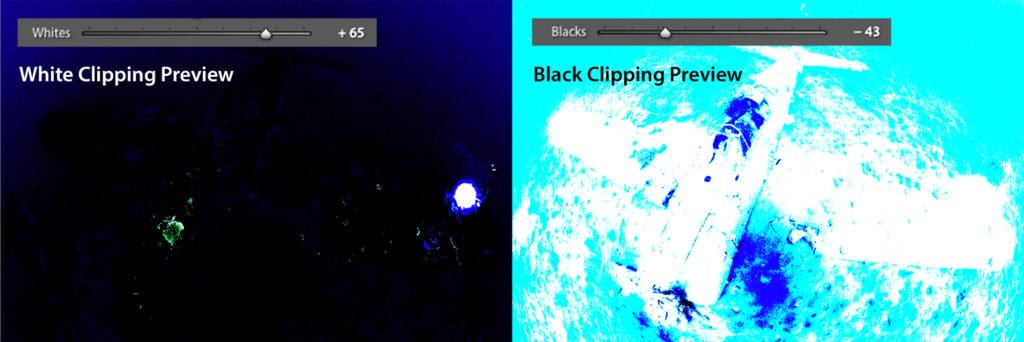
- While holding down OPT (Mac) or ALT (PC) click on the handle of the Whites slider. You’ll see a black clipping preview screen. Slide the handle towards the right just until you begin to see small areas of color. Slide back towards the left until just the teensiest pinpoint of light pixels remain. Those light pixels are the white point in your image.
- Slide the Shadows slider to the left until the shadow details are as you desire.
- While holding down OPT (Mac) or ALT (PC) click on the handle of the Blacks slider. You’ll see a white clipping preview screen. Slide the handle towards the left until you begin to see small areas of color, then slide back towards the right until just a smidge of dark remains. Those dark pixels represent the black point in your image.
- Re-adjust any of the Basic panel sliders as needed.
- Move on to the HSL panel (Hue, Saturation and Luminance) and local tools.